THE LEAD LADS® / PROJECT ARCHIVE

Lead Dormer
Roofing

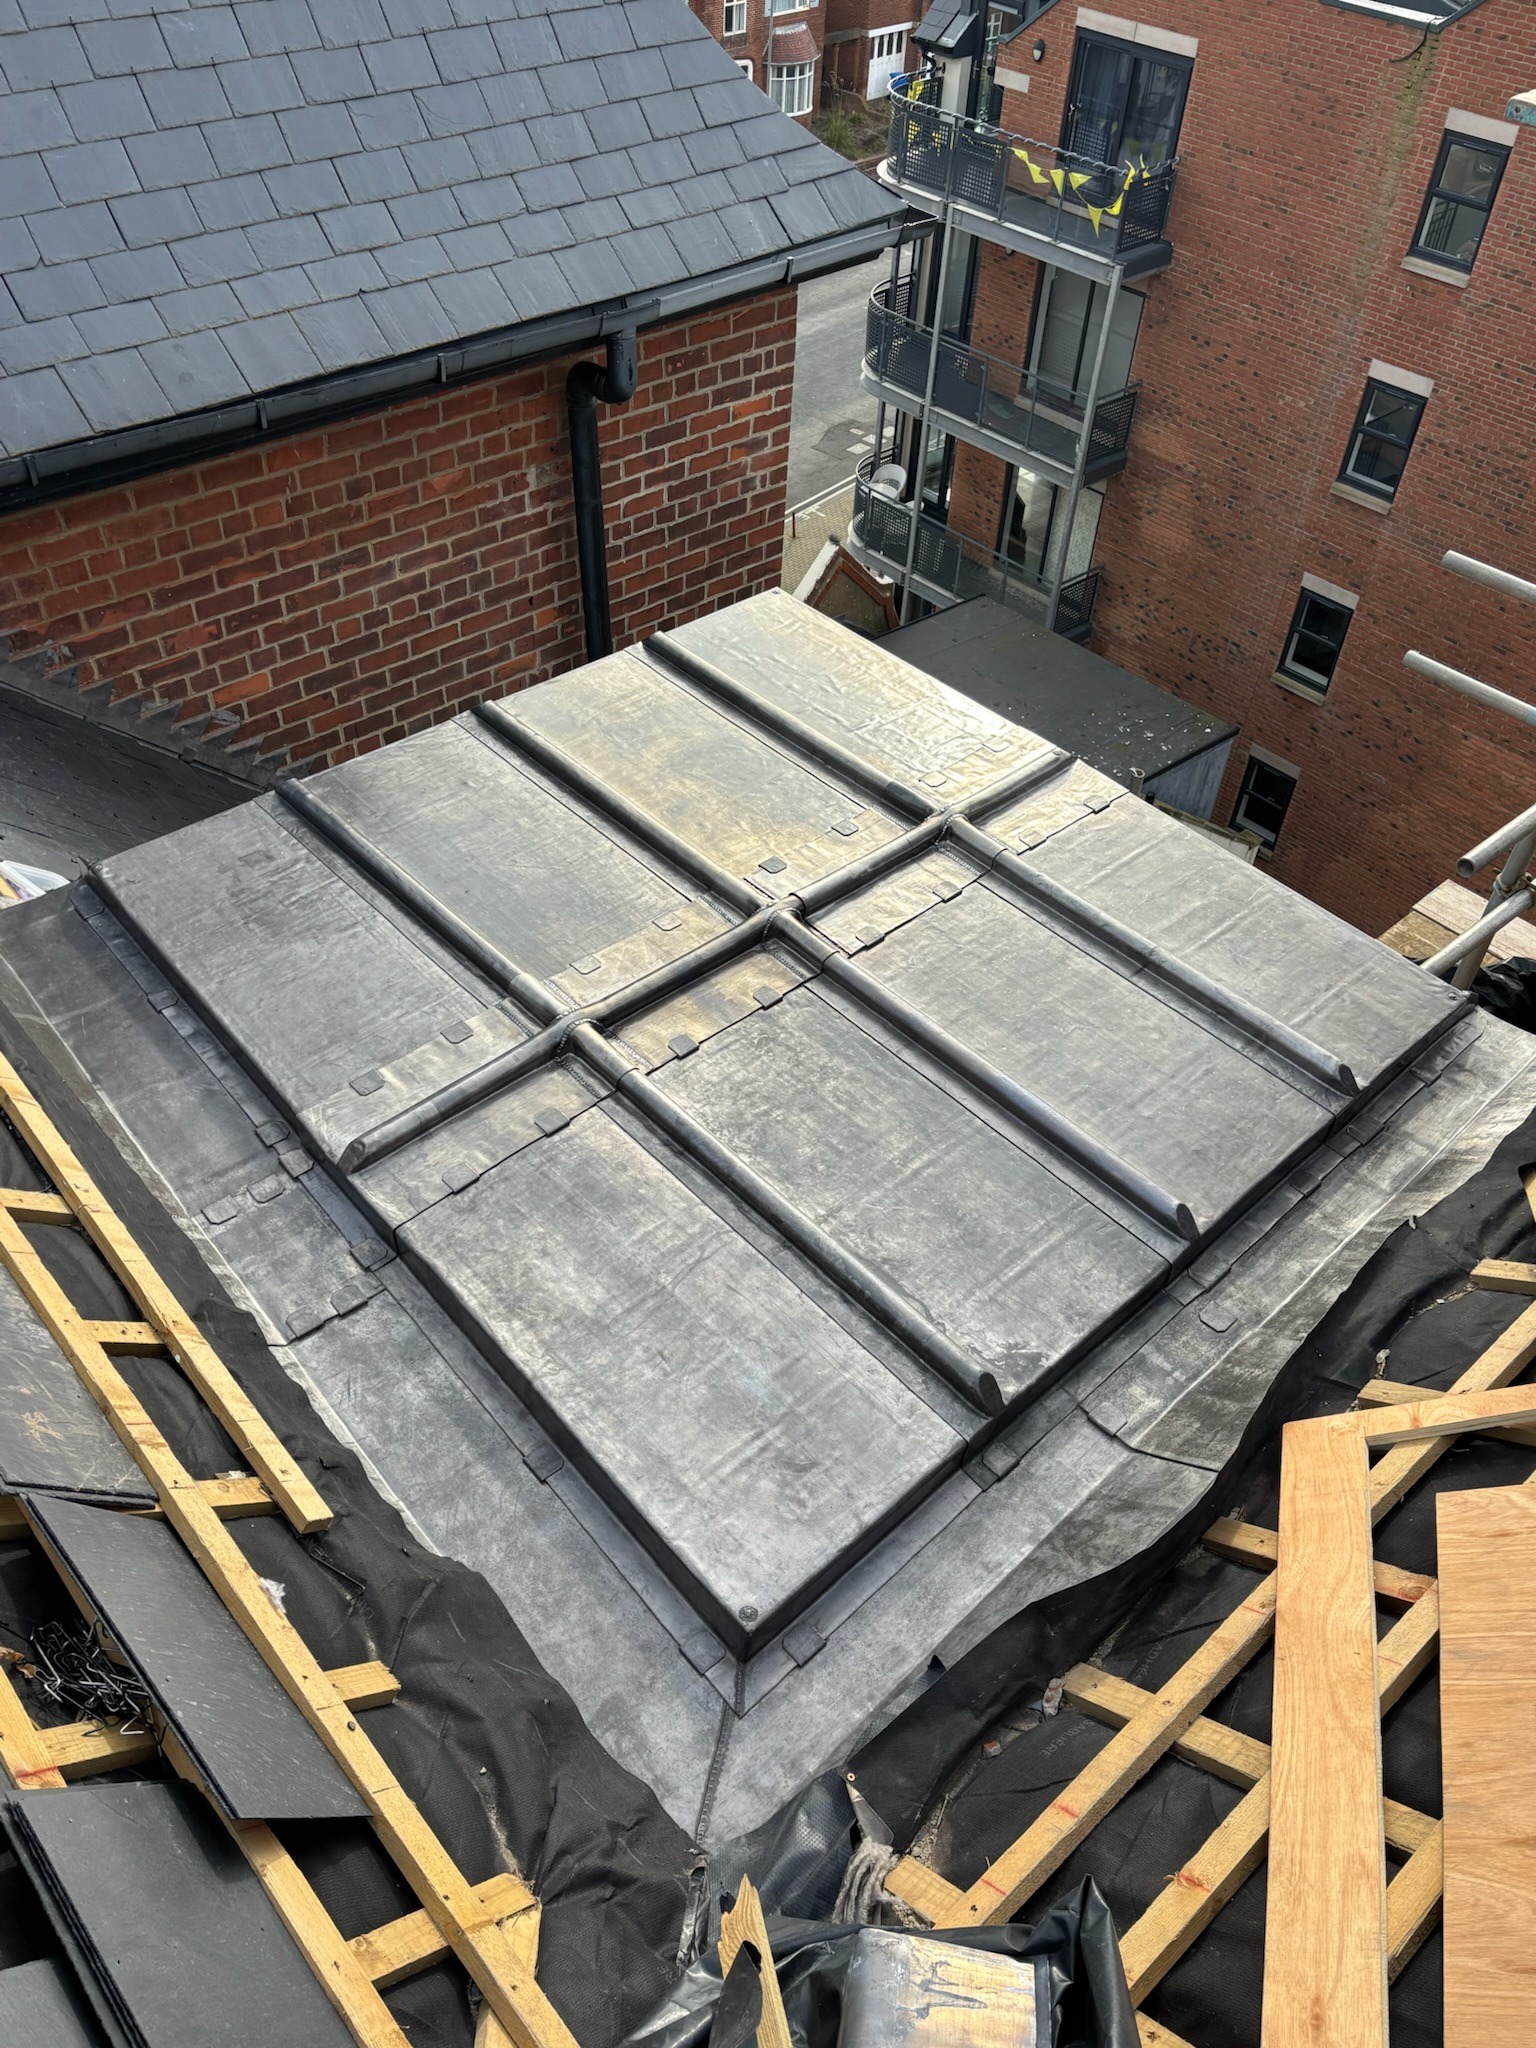
New Code 5 lead roof coverings to dormer structures at the Metropole in Whitby, incorporating fully supported sheet leadwork, exposed-edge restraint, movement detailing and carefully formed interfaces within a demanding coastal environment.

WHITBY · NORTH YORKSHIRE · CODE 5 LEAD · COASTAL DORMER

Explore the Project

01 — THE PROJECT

Lead dormer roofing in an exposed coastal location

This project involved the installation of new lead roof coverings to dormer structures at the Metropole in Whitby, North Yorkshire.

Dormers combine several vulnerable interfaces within a relatively compact area. Roof covering, cheeks, flashings, exposed edges and junctions with the surrounding roof all need to operate as part of one weathering system.

At Whitby, the exposed location also placed particular emphasis on restraint, movement allowance and the quality of the supporting build-up beneath the finished Code 5 leadwork.

LEADWORK WHITBY →
LEAD DORMERS →
LEADWORK GUIDES →

LOCATION

Whitby

PROGRAMME

Approx. 6 Days

LEAD CODE

Code 5

EXPOSURE

Coastal

02 — THE DORMER

A small roof containing multiple junctions

A dormer is effectively a miniature building envelope projecting through a larger roof.

Its leadwork may need to resolve the top covering, perimeter edges, interfaces with the surrounding roof, flashings and the construction immediately around the window structure.

These separate elements cannot be treated independently. Water shedding from the upper surface has to be transferred safely into the surrounding roof covering while the lead itself remains capable of normal movement.

Key considerations

  • Fully supported lead roof covering
  • Code 5 rolled lead sheet
  • Exposed perimeter edges
  • Compatible restraint
  • Thermal movement
  • Roof-to-dormer interfaces
  • Moisture strategy beneath the covering
  • Coastal weather exposure

03 — TECHNICAL APPROACH

Design the build-up before forming the lead

The visible lead covering is only the outer weathering layer.

Beneath it, the supporting deck and wider roof construction need to provide the geometry, structural support and moisture-management strategy required by the particular dormer build-up.

Once that background is established, the lead can be divided and restrained in a way that accommodates sheet movement without unnecessarily fixing the covering rigidly to the structure.

Code 5 lead was used on this project. Lead selection on other dormers should respond to panel dimensions, geometry, exposure and specification rather than to the word “dormer” alone.

BS 6915 →
BS EN 12588 →
LSTA Guidelines →

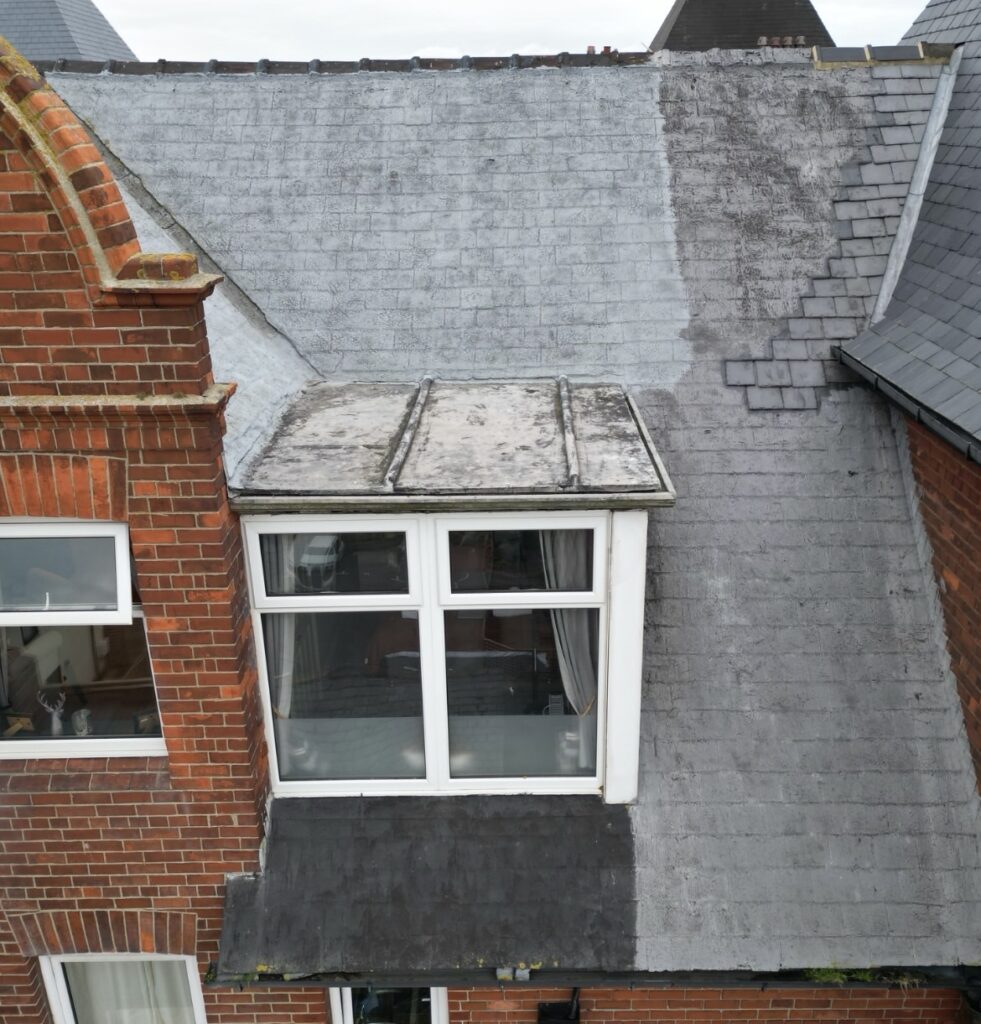
Before

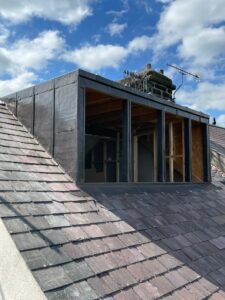
The dormer structure before installation of the renewed lead weathering system.

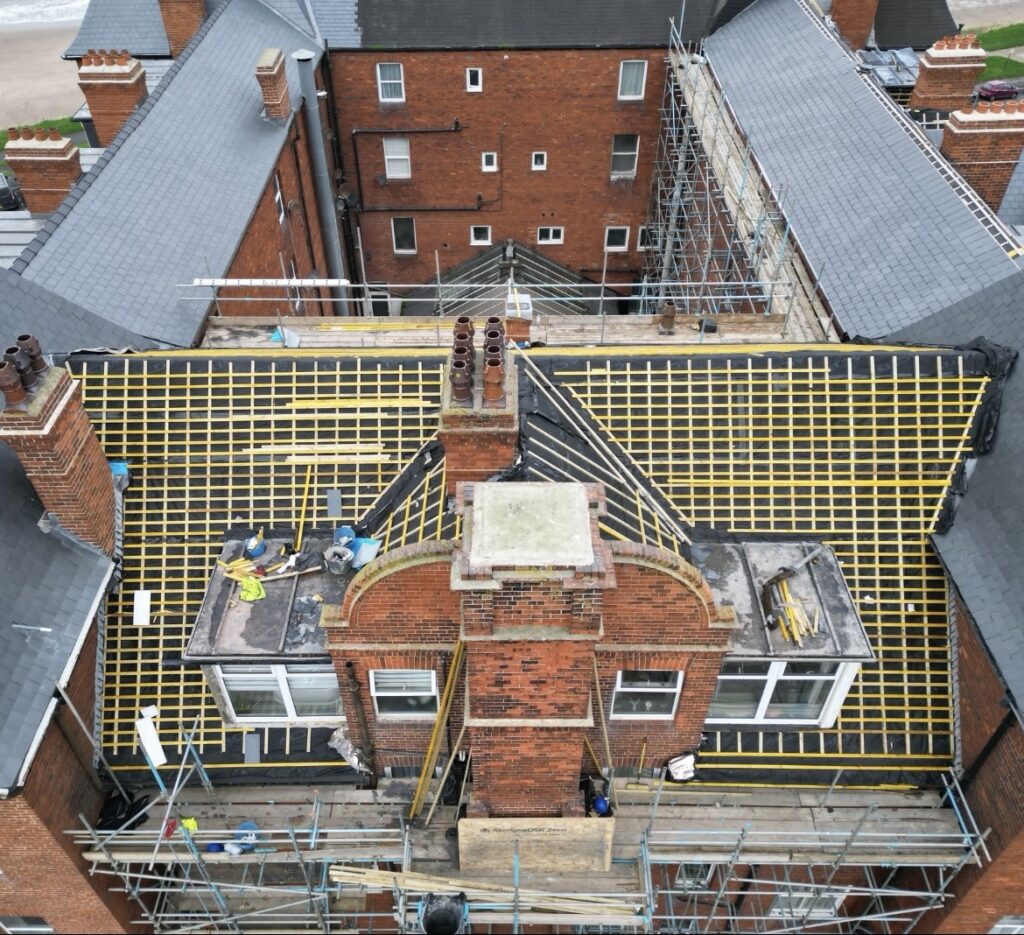
During

Preparation of the supporting construction before completion of the new lead covering.

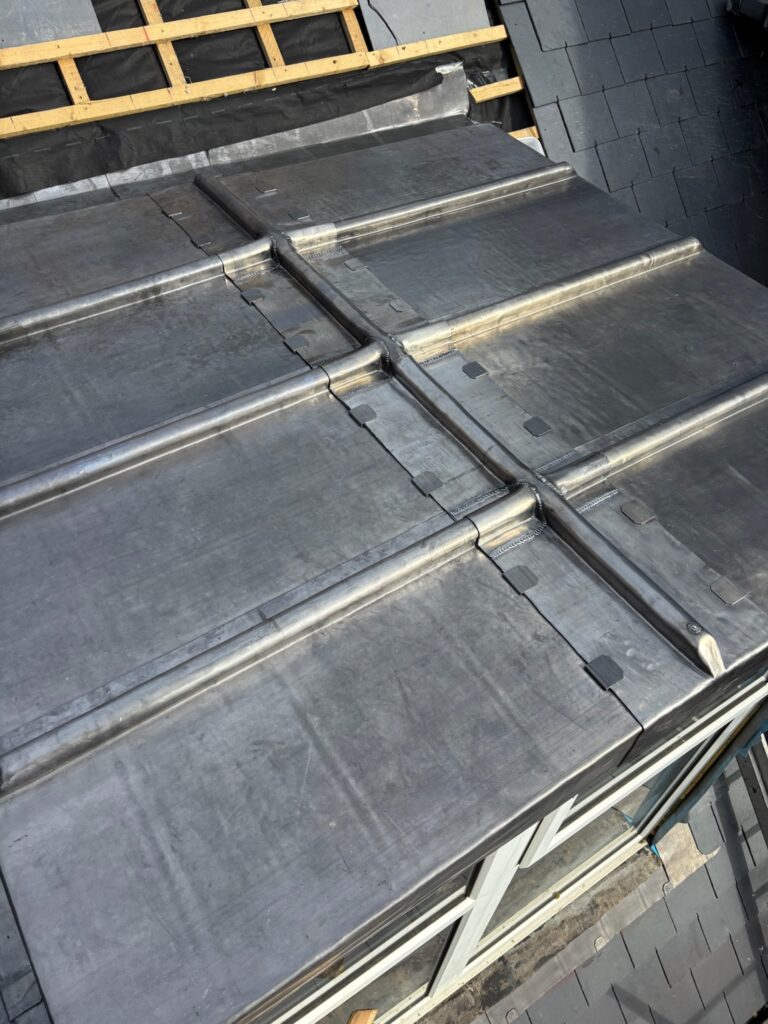
Completed

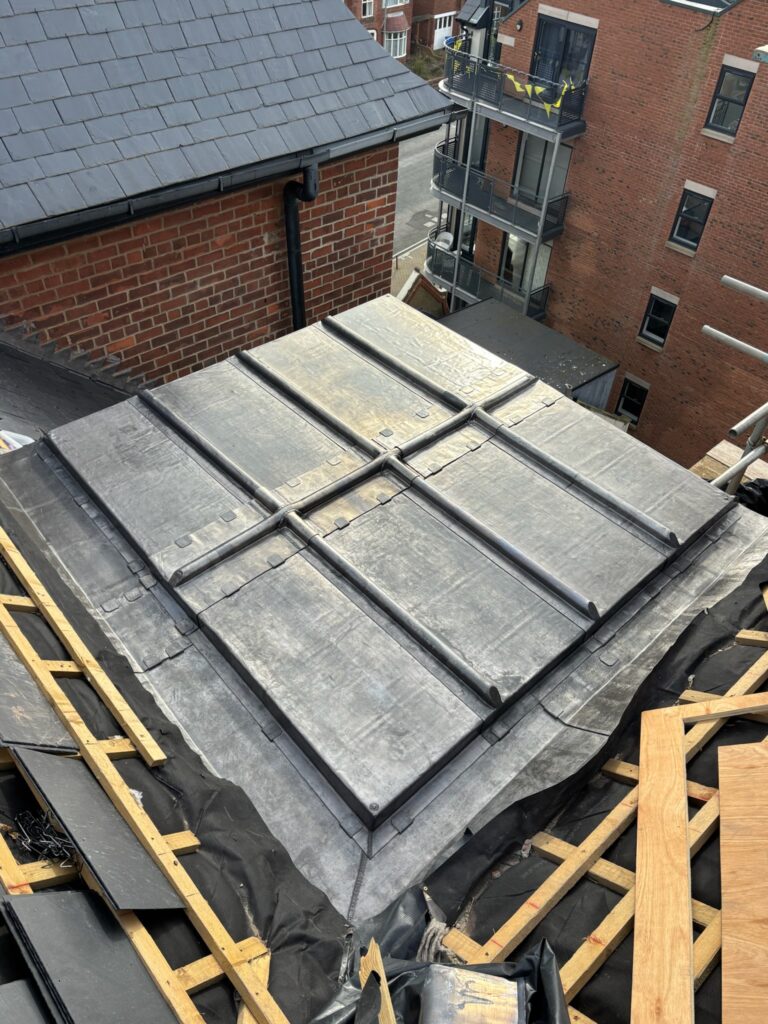
The finished Code 5 dormer covering with controlled perimeter and interface detailing.

04 — COASTAL EXPOSURE

The exposed edges matter

Whitby’s coastal setting places roofing details in a demanding environment where wind-driven rain and exposed edges deserve particular attention.

On a dormer, the perimeter of the lead covering can be more vulnerable than the centre of the sheet because uplift acts directly on exposed terminations.

Continuous copper restraint was therefore incorporated at appropriate edges on this project, securing the lead while maintaining a compatible detail with the sheet covering.

The principle is simple: secure vulnerable edges without converting the entire covering into a rigidly fixed sheet.

05 — MOVEMENT + MOISTURE

Two different problems beneath one sheet

Lead needs freedom to respond to temperature change, while the roof construction beneath it also needs an appropriate strategy for moisture and condensation.

Those are related but separate design questions.

The sheet layout, joints, clips and fixings address movement within the leadwork. The construction beneath the covering must separately deal with insulation, vapour control and ventilation where required by the chosen roof build-up.

This project incorporated a ventilated supporting arrangement. Other dormer roofs may require a different build-up depending on their design.

LEAD DORMERS →
LEAD EXPANSION JOINT →

06 — SIGNATURE DETAIL

Continuous edge restraint

The edge detail is especially important on an elevated dormer in an exposed location.

The lead covering needs to terminate neatly while remaining secure against wind action.

A continuous copper clip provides restraint at the perimeter without relying on direct fixing through the exposed field of the sheet.

It is a relatively small component, but it demonstrates an important principle of traditional leadwork: restraint should be concentrated where it is needed while the covering remains free to behave as sheet lead.

07 — PREPARATION + SUPPORT

Building the background for the lead

  • Safe access established to the dormer areas
  • Existing coverings removed where required
  • Supporting timber inspected
  • Defective materials removed
  • New exterior-grade plywood deck installed where specified
  • Treated timber support incorporated within the ventilated build-up
  • Roof geometry checked before lead installation
  • Suitable building paper / separation layer installed beneath the lead
  • Perimeter and interface details prepared before sheet installation

The finished leadwork can only be as accurate as the construction beneath it, particularly around corners, changes of level and exposed edges.

08 — LEADWORK INSTALLATION

Forming the new dormer covering

  • Code 5 rolled lead sheet set out to the dormer geometry
  • Individual pieces measured and formed to suit the roof
  • Sheet divisions arranged to manage normal thermal movement
  • Expansion details incorporated where required by the layout
  • Compatible copper and stainless-steel fixings used where appropriate
  • Continuous copper clips installed at exposed edges
  • Welted perimeter details formed where required
  • Lead dressed into adjoining roof interfaces
  • Corners bossed or welded where appropriate
  • Completed fixing arrangement checked for movement allowance
  • Patination oil applied following installation

09 — MATERIALS

The dormer roof build-up

  • Code 5 rolled lead sheet
  • Exterior-grade plywood
  • Timber support within the roof build-up
  • Suitable building paper / lead underlay
  • Copper clips
  • Compatible non-ferrous fixings
  • Expansion joint where required
  • Patination oil

CODE 5 LEAD →
18MM PLYWOOD →
LEAD UNDERLAY →
LEADWORK FIXINGS →
EXPANSION JOINT →
PATINATION OIL →

10 — THE CRAFT

Detailing the dormer envelope

  • Lead setting out
  • Lead bossing
  • Lead welding
  • Welt formation
  • Perimeter restraint
  • Continuous copper clipping
  • Dormer interface detailing
  • Movement detailing
  • Substrate preparation
  • Coordination with the wider roof build-up

A dormer may be relatively small, but every elevation introduces another transition between materials, angles and weathering planes.

11 — PROJECT RECORD

Prepare.
Restrain.
Weather.

The Whitby project record shows the dormer before work, the supporting construction during installation and the finished Code 5 lead covering.

Together, the images reveal the relationship between the visible leadwork and the substrate, edge restraint and detailing beneath it.

12 — LEAD DORMERS

A dormer is more than its top covering

Dormer leadwork can include roofs, cheeks, aprons, jambs, flashings, gutters and perimeter details.

That makes the design of the whole assembly more important than any individual sheet.

Sheet dimensions and fixing affect movement. The substrate affects geometry. The roof build-up controls moisture risk, while flashings and perimeter details connect the dormer back into the surrounding roof.

Lead Dormers →
Lead Dormer Detailing Guide →
Leadwork Guides →
Lead Welding Guide →

13 — WHITBY LEADWORK

Lead roofing in a coastal environment

Whitby gives this project a useful additional layer within the archive.

The same basic leadwork principles still apply, but greater exposure makes the quality of exposed-edge detailing, fixing and interfaces particularly visible in the completed design.

This project therefore connects the local Whitby service page with a real dormer installation rather than relying on location copy alone.

Leadwork Whitby →
Lead Dormer Roofing →
Request a Leadwork Quote →

14 — WHAT THIS PROJECT SHOWS

Exposure changes the importance of the edge

The Whitby project demonstrates that the centre of a lead sheet is often the simplest part of the roof.

Much of the real detailing happens around its boundaries: perimeter edges, junctions, interfaces, clips and changes in construction.

In an exposed location these areas become particularly important because they have to resist weather while continuing to accommodate normal sheet movement.

The finished performance therefore depends on the relationship between lead, substrate, restraint and the surrounding roof rather than on the lead code alone.

PROJECT TAKEAWAYS

  • Dormers contain multiple weathering interfaces.
  • Coastal exposure increases the importance of perimeter restraint.
  • The supporting construction determines the lead geometry.
  • Movement and condensation are separate design considerations.
  • Ventilation depends on the chosen roof build-up.
  • Compatible clips restrain lead without unnecessarily locking the sheet.
  • Code selection must reflect actual dimensions and exposure.

15 — FREQUENTLY ASKED

Lead dormer questions

What lead code was used on the Whitby dormers?

Code 5 rolled lead sheet was used on this project. The appropriate code for another dormer depends on panel size, geometry, exposure and the wider specification.

Why are clips used on dormer leadwork?

Compatible clips can restrain exposed edges and vulnerable parts of the covering while allowing the main sheet to respond to normal thermal movement.

Does every lead dormer require ventilation beneath it?

No single build-up applies to every dormer. Ventilation, insulation and vapour-control requirements depend on whether the construction is designed as a ventilated or unventilated roof assembly and on the wider moisture strategy.

Why might an expansion joint be used?

A purpose-made movement joint may be incorporated where the sheet layout or dimensions require a controlled break capable of accommodating thermal movement. It is not automatically required on every dormer.

Why is plywood used beneath lead?

A suitable continuous deck can provide the stable, accurately formed support required by fully supported sheet leadwork.

What does patination oil do?

Patination oil is applied to newly installed lead to help control early surface staining and reduce runoff marking onto adjacent materials while the lead begins to weather.

THE LEAD LADS® / PROJECT ARCHIVE

Coastal exposure. Controlled restraint. Proper leadwork.

The Whitby dormer project forms part of The Lead Lads® archive documenting specialist lead roofing across bays, dormers, gutters, canopies, heritage masonry details and architecturally complex roof forms.

Its defining lesson is at the perimeter: successful lead dormer roofing depends not only on the sheet itself, but on support, movement, edge restraint, moisture control and the interfaces connecting the dormer back into the wider roof.