

THE LEAD LADS® / PROJECT ARCHIVE
Complete renewal of two lead-clad dormers at Hornscroft Park in Hull, including new plywood support, Code 5 lead tops, cheeks, jambs, aprons and fascia details, with the window openings temporarily removed to allow the weathering system to be rebuilt correctly.
HULL · EAST YORKSHIRE · CODE 5 LEAD · DORMER LEADWORK
Explore the Project01 — THE PROJECT
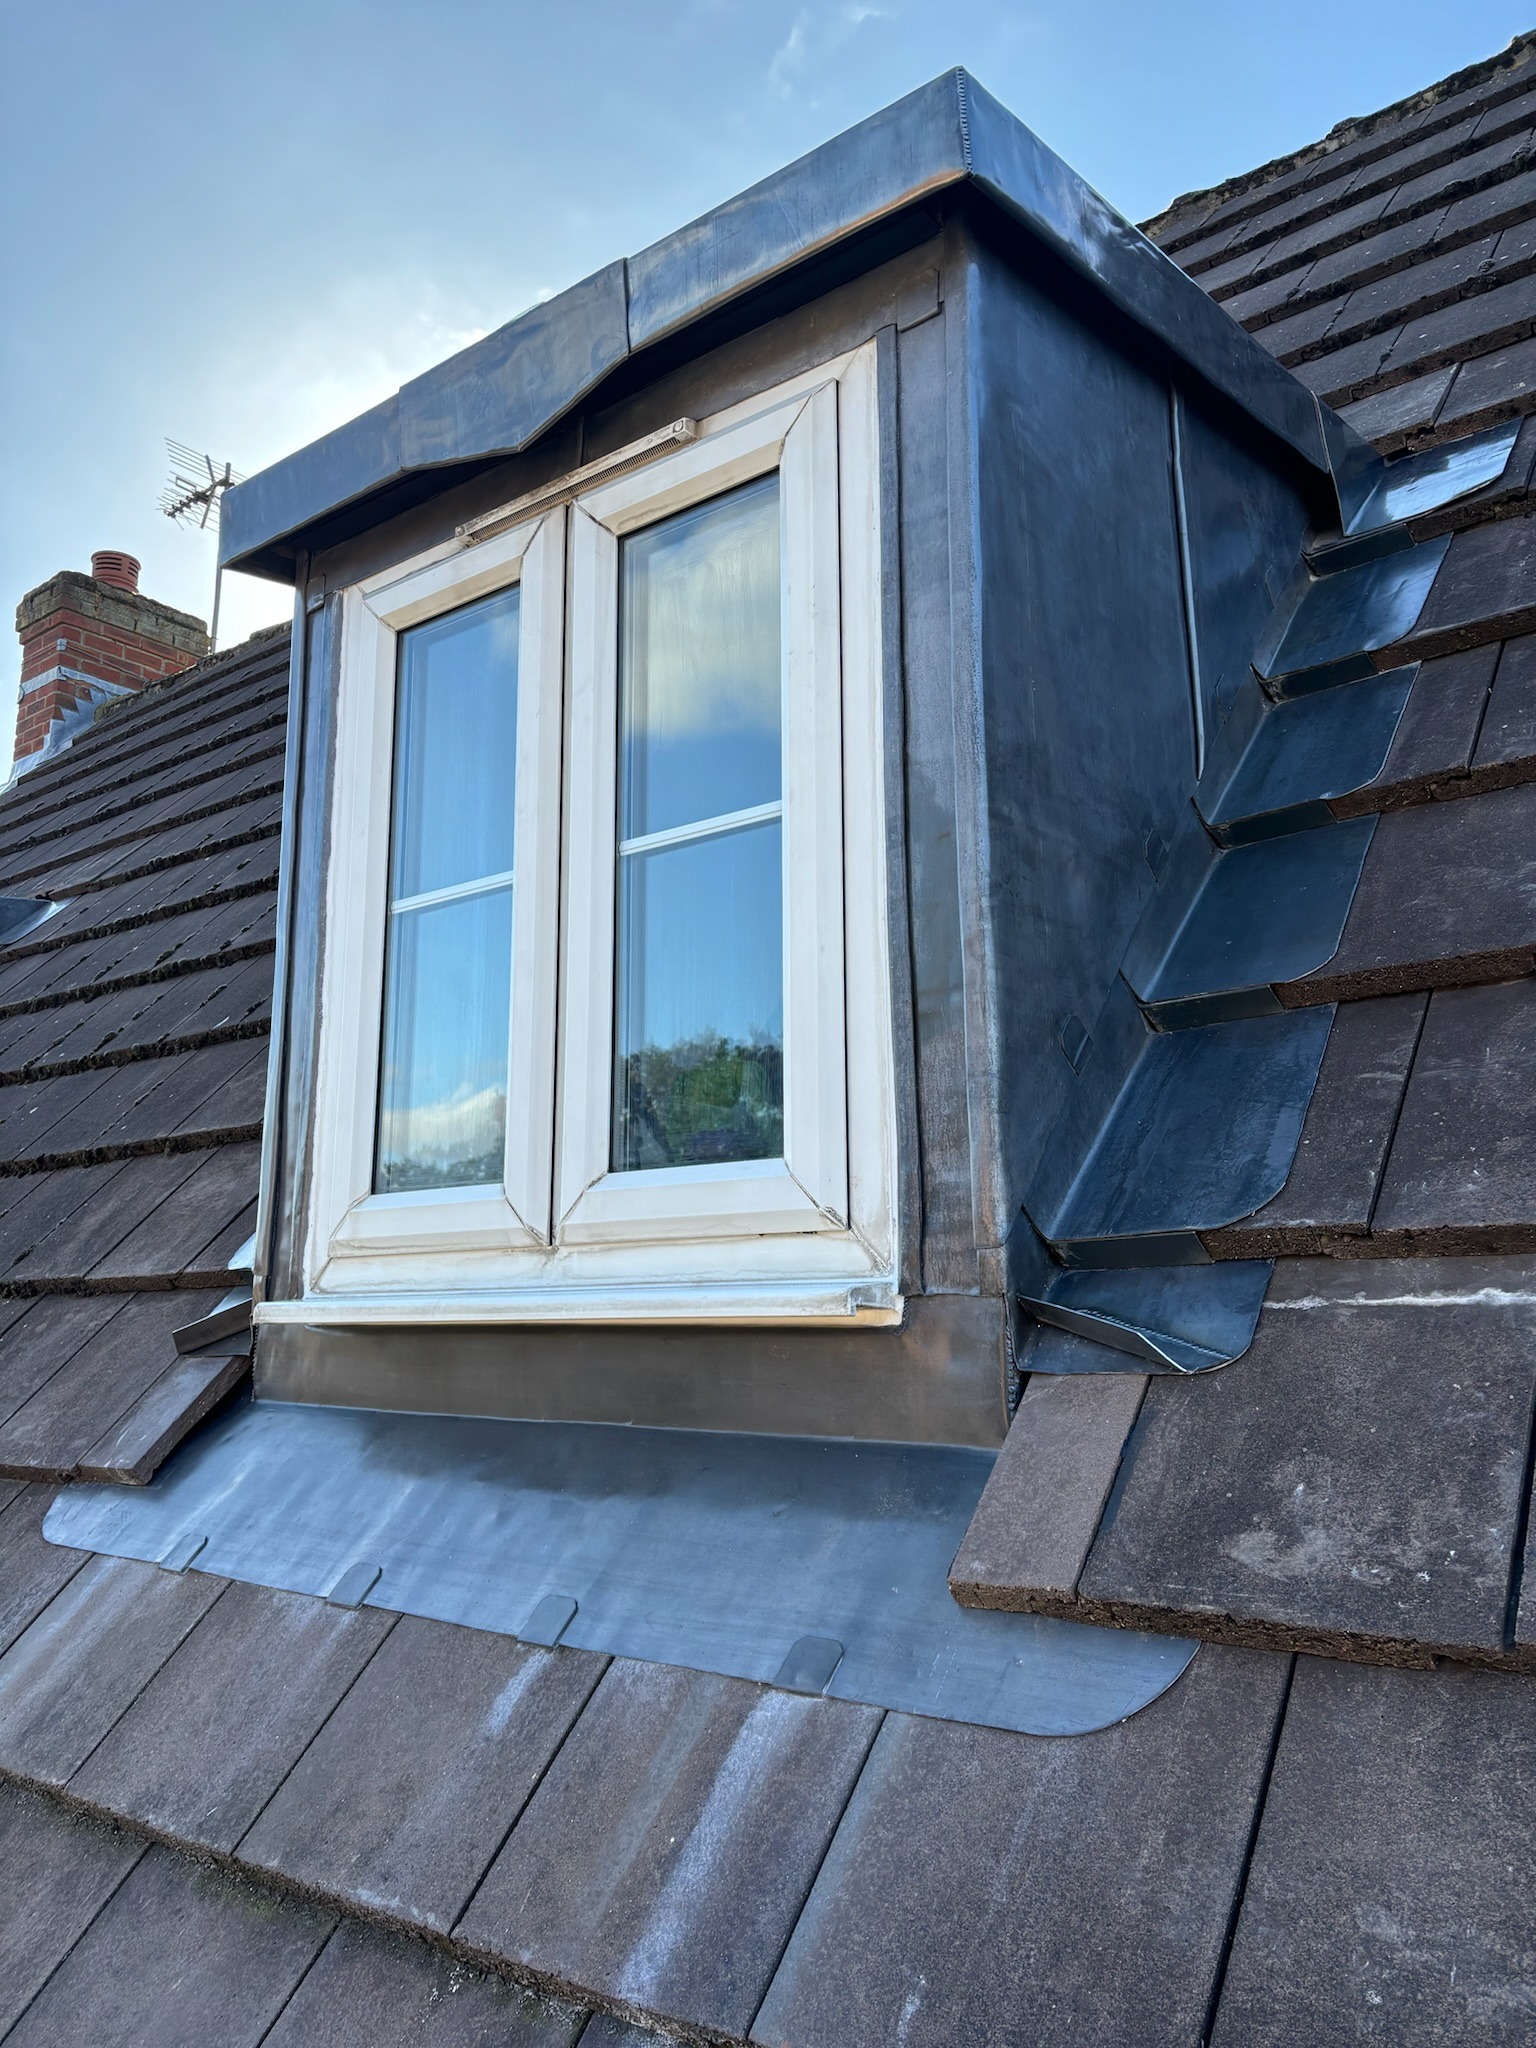
The Lead Lads® renewed the leadwork to two front-facing dormer windows at a residential property in Hornscroft Park, Kingswood, Hull.
Each dormer forms a small roof and wall system within the main pitched roof. The lead therefore has to weather several different planes and junctions at once: the dormer top, cheeks, front apron, window jambs, fascia edges and connections back into the tiled roof.
The existing coverings were stripped, the supporting construction renewed and overboarded, and a new Code 5 lead package installed across the complete dormer envelopes.

LOCATION
PROGRAMME
LEAD CODE
SCOPE
02 — THE DORMER
A dormer appears relatively simple from ground level, but its leadwork has to deal with several changes in direction over a very small area.
The top sheds water back onto the principal roof. The cheeks weather the side walls. Aprons protect the front junction. Jambs interface with the window opening, while fascia and drip details control discharge away from the face of the dormer.
These elements need to operate as one coordinated system rather than as separate pieces of sheet.
03 — TECHNICAL APPROACH
Replacing visible sheet alone is not always enough where the supporting structure or perimeter junctions also need attention.
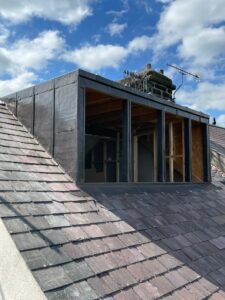
On this project, the existing lead was removed and the dormers were overboarded with new plywood to create a smooth, continuous background for the replacement sheet.
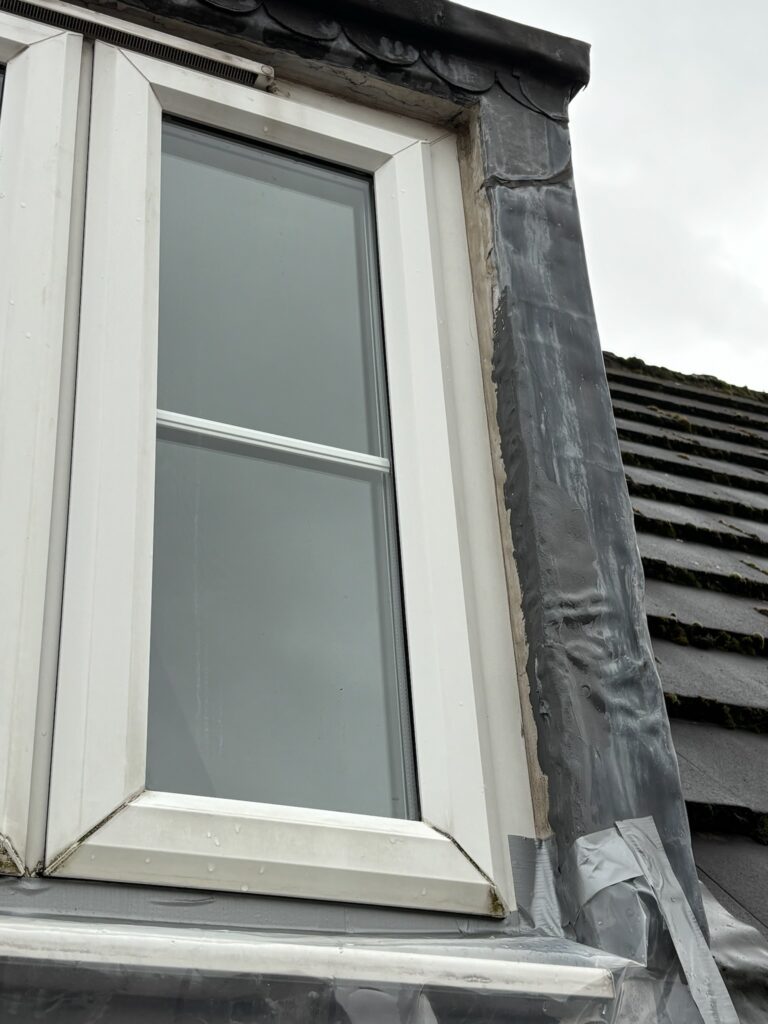
The UPVC windows were also temporarily removed where required. This allowed the new lead jambs and surrounding weathering to be formed properly around the openings rather than attempting to patch into inaccessible existing junctions.
The finished leadwork was installed using Code 5 rolled lead sheet with compatible non-ferrous fixings, underlay, wood rolls and formed junction details.

The dormers before removal of the previous lead coverings and temporary repairs.
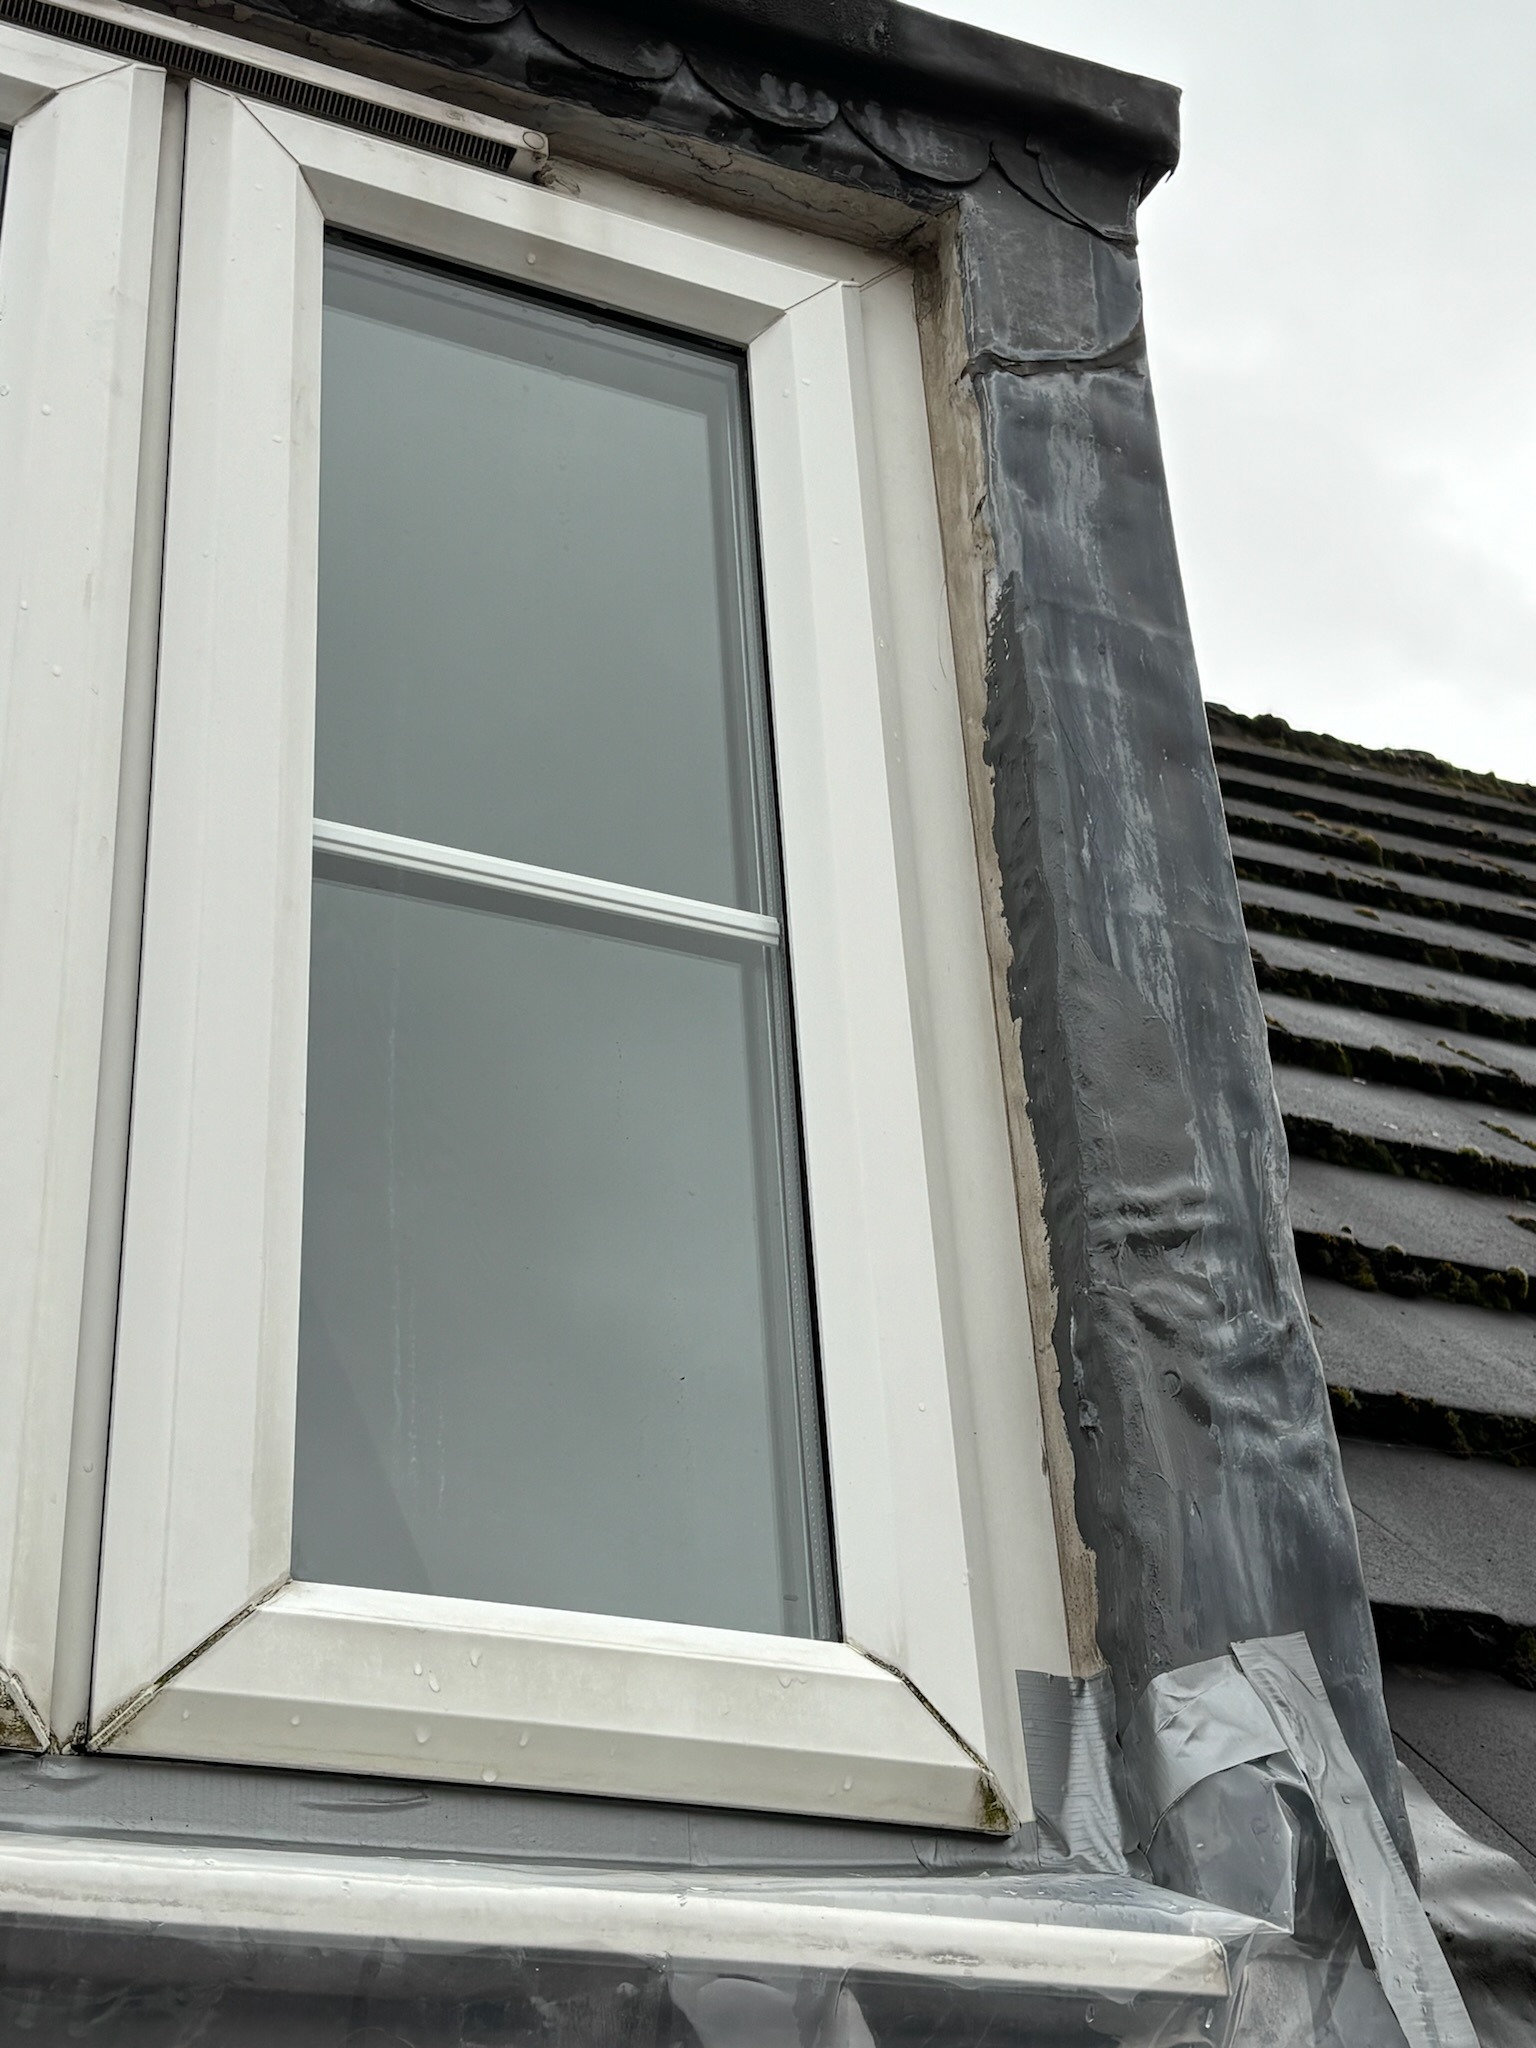
The existing lead was stripped to allow the support and perimeter details to be rebuilt.
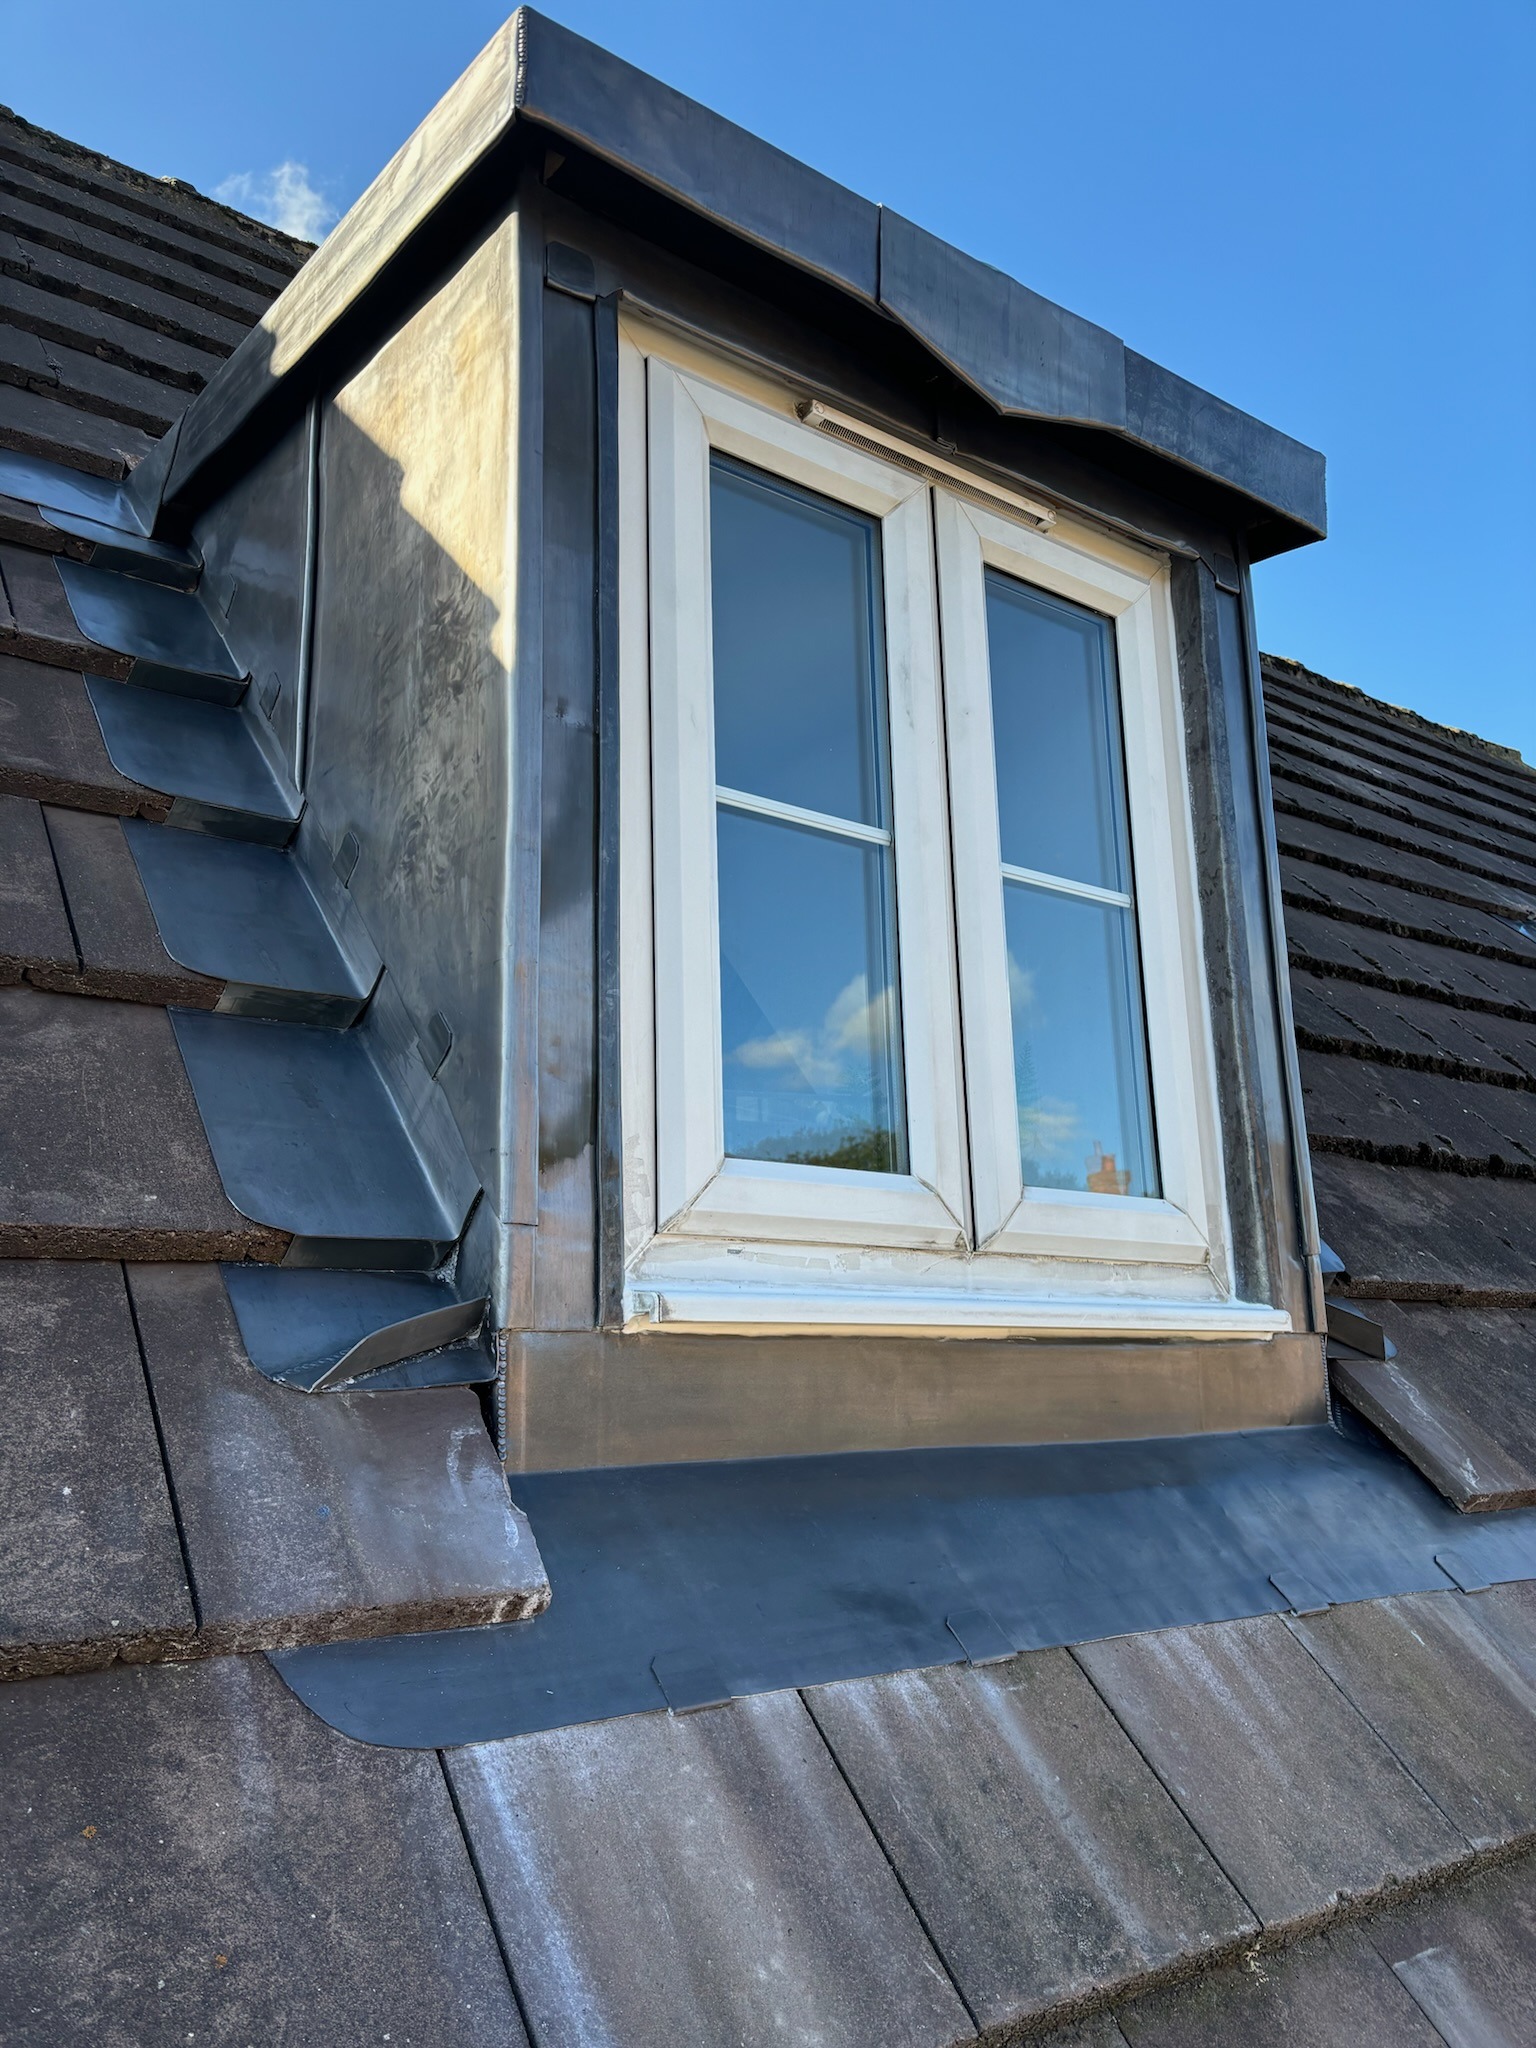
Code 5 lead forms the new tops, cheeks, aprons, jambs and edge details.
04 — TOP + CHEEKS
The top and side cheeks meet at some of the dormer’s most exposed junctions.
The roof covering has to discharge water clear of the front face while the side sheets protect the timber-framed cheeks and integrate with the surrounding tiled roof.
Lead is particularly well suited to this kind of geometry because separate sheets can be dressed around changes in plane and formed into neat corners, drips and overlaps.
05 — WINDOWS + JAMBS
The window is not independent of the dormer leadwork. Its jambs, head and sill interfaces all form part of the surrounding weathering system.
Removing the UPVC frames where required gave access to those concealed edges and allowed the new lead jamb details to be formed before the windows were reinstated.
This avoids relying on surface sealants or local patches to compensate for inaccessible junctions.
The result is a more coherent relationship between the window opening and the new dormer envelope.
06 — SIGNATURE DETAIL
The strongest feature of this project is not one individual detail, but the way every lead element connects.
The roof sheet, cheeks, apron, jambs, fascia and window junctions all protect different parts of the dormer, but none works in isolation.
Water needs to move progressively from the highest point of the dormer onto the main roof covering without being given an opportunity to track behind an edge or opening.
That makes sequencing particularly important: substrate first, concealed junctions second, visible sheet work third, windows and finishes last.
07 — PREPARATION + SUBSTRATE
08 — LEADWORK INSTALLATION
09 — MATERIALS
CODE 5 LEAD →
18MM PLYWOOD →
LEAD UNDERLAY →
LEADWORK FIXINGS →
10 — SKILLS
Dormer leadwork concentrates a wide range of traditional leadworking skills into a relatively small architectural element.
11 — PROJECT RECORD
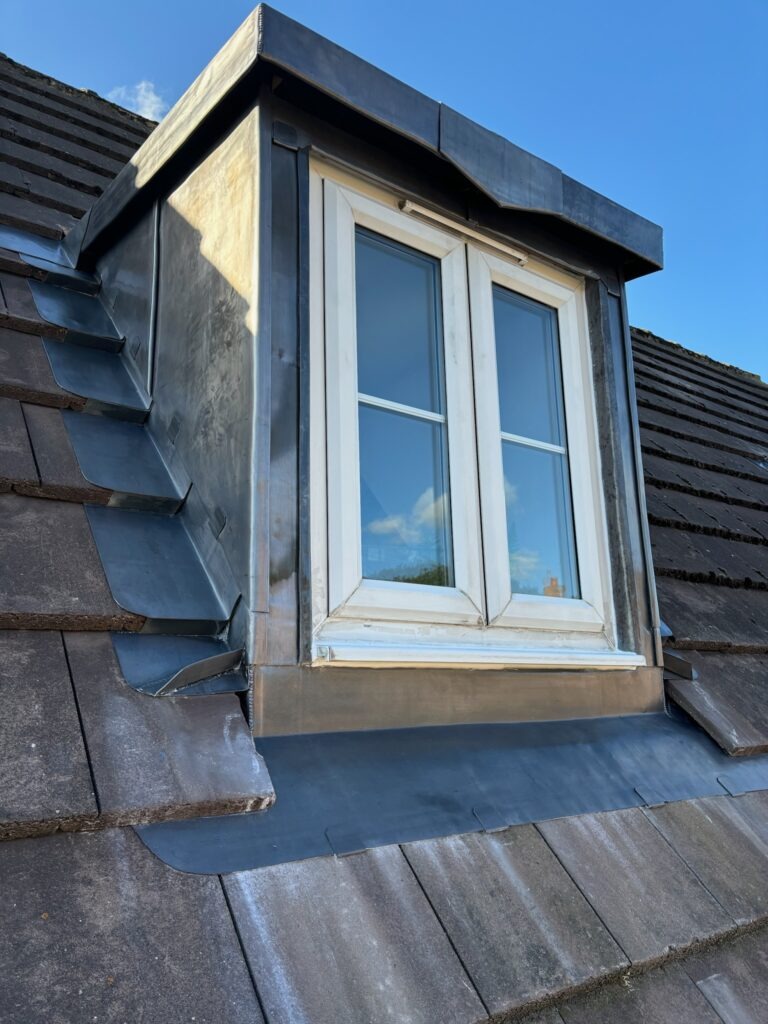
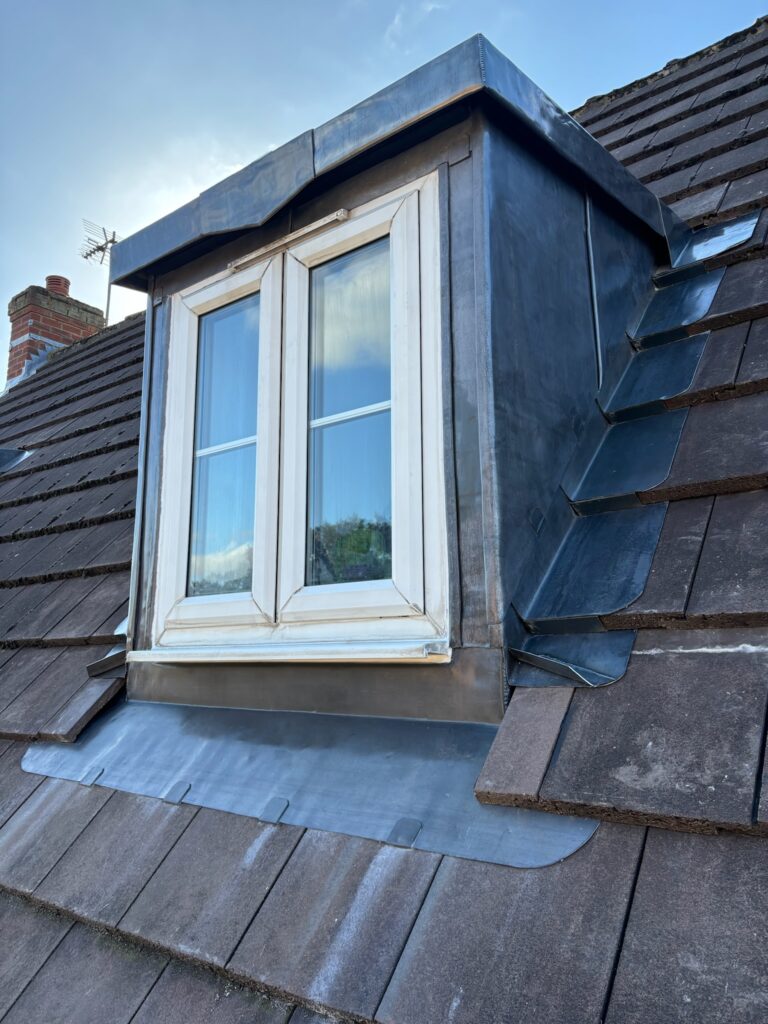
The before-and-after record shows why a complete dormer renewal is fundamentally different from applying another local repair.
The replacement process provided access to the support, window interfaces and perimeter junctions before the new Code 5 lead envelope was formed.

12 — DORMER WEATHERING
A well-detailed dormer is arranged so each upper element sheds onto the detail immediately below it.
The top covering discharges towards the main roof. Cheeks overlap and weather the side construction. Aprons protect the front junction, while jamb details prevent water tracking around the window opening.
The sequencing of those overlaps is just as important as the material from which they are made.
13 — TECHNICAL RESOURCES
Leadwork Standards →
The Lead Handbook →
Lead Roofing Guides →
Lead Sizing + Ordering Chart →
Lead Weight Calculator →
The project archive connects completed work with the standards, materials and detailing principles behind it.
14 — WHAT THIS PROJECT SHOWS
Although small in area, a dormer combines roof covering, wall cladding, openings, flashings and drainage edges within one detail.
That means leaks cannot always be solved effectively by concentrating only on the most visible sheet of lead.
A complete renewal provides the opportunity to inspect the supporting construction, rebuild concealed junctions and establish a coherent weathering sequence before the visible finishes are reinstated.
PROPERTY OWNER TAKEAWAYS
15 — FREQUENTLY ASKED
Lead can be used across the dormer roof, cheeks, aprons, jambs, fascia details and associated flashings, depending on the design of the dormer.
The correct code depends on the size and geometry of each individual sheet. Code 5 rolled lead sheet was used throughout this project.
Fully supported lead requires a smooth and stable background. Plywood can provide a continuous substrate where suitably specified and detailed.
They can. On this project the UPVC windows were temporarily removed where required so the concealed jamb and perimeter leadwork could be detailed properly.
Local repairs may be suitable for isolated defects, but where deterioration affects multiple parts of the dormer or the support beneath, broader renewal may provide a more coherent solution.
16 — MATERIALS + RESOURCES
Lead Roofing Project Archive →
Leadwork Services →
Code 5 Rolled Lead →
18mm Plywood →
Lead Underlay →
Wood Core Roll →
Copper Fixing Strip →
Leadwork Fixings →
Lead Lads Shop →
THE LEAD LADS® / PROJECT ARCHIVE
The Hull dormer project forms part of The Lead Lads® archive documenting lead roofs, dormers, gutters, bays, canopies, flashings and specialist architectural leadwork.
It demonstrates why successful dormer leadwork depends on the relationship between structure, windows, underlay, sheet sizing, perimeter junctions and the tiled roof around it — not simply the visible sheet on top.