


THE LEAD LADS® / PROJECT ARCHIVE
Replacement of a failed mortar weathering detail to a traditional masonry wall in Poppleton, York, using a new plywood substrate, Code 5 rolled lead capping and continuous stainless-steel edge restraint.
POPPLETON · YORK · MASONRY WALL · CODE 5 LEAD
Explore the Project01 — THE PROJECT
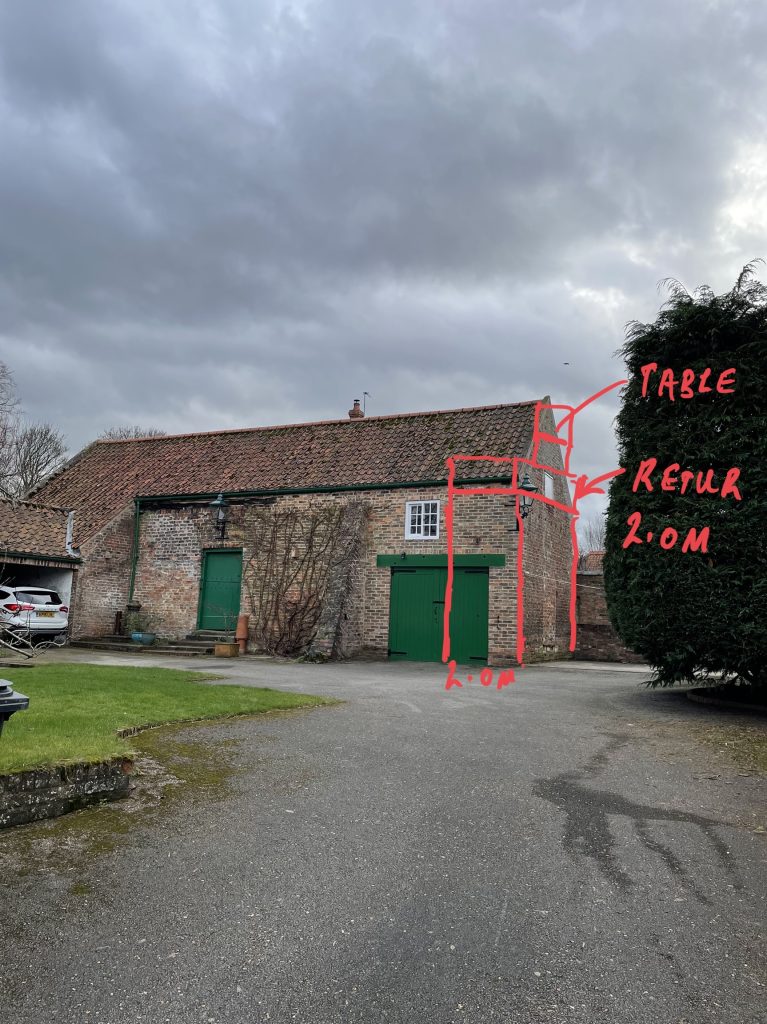
The Lead Lads® were instructed to renew the weathering detail to the head of a traditional masonry wall at a barn property in Poppleton, York.
The original detail relied on mortar to weather the junction between the masonry wall and adjoining pantile roof. Over time this rigid material had cracked and deteriorated, allowing moisture to penetrate the wall head and contribute to decay in the surrounding construction.
The failed mortar was removed and replaced with a supported Code 5 lead capping designed to provide a more durable, flexible and maintainable weathering layer.

LOCATION
PROGRAMME
LEAD CODE
DETAIL
02 — EXISTING CONDITION
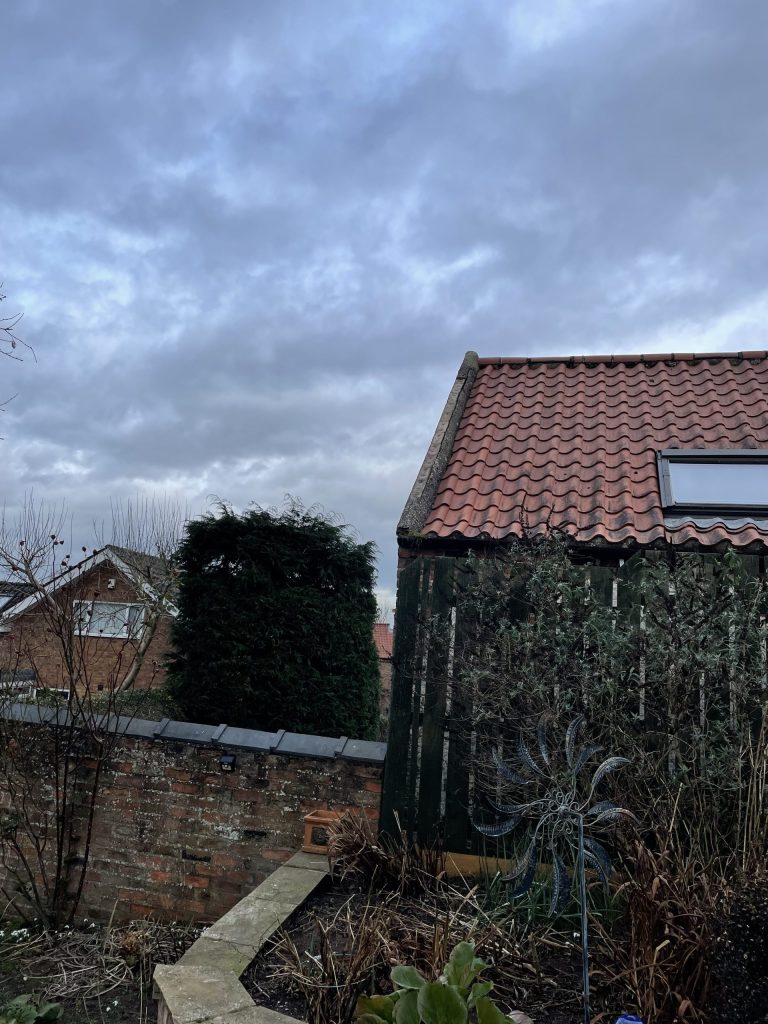
The top of the wall had previously been weathered using a rigid mortar-based detail.
Mortar can perform adequately in some sheltered situations, but exposed wall heads experience thermal movement, rainfall and repeated wetting and drying. Once cracking begins, water can enter the masonry beneath and the deterioration can accelerate.
At Poppleton, the failed detail had already left the wall head vulnerable and contributed to decay in an adjacent timber window.
03 — TECHNICAL APPROACH
The replacement detail separated the weathering function from the masonry itself.
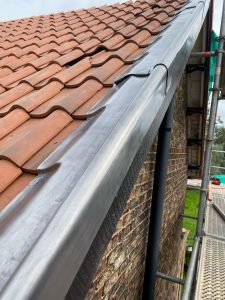
A new plywood substrate provided a continuous and predictable support surface. Code 5 lead was then formed over the wall head and dressed into the adjoining pantile roof interface.
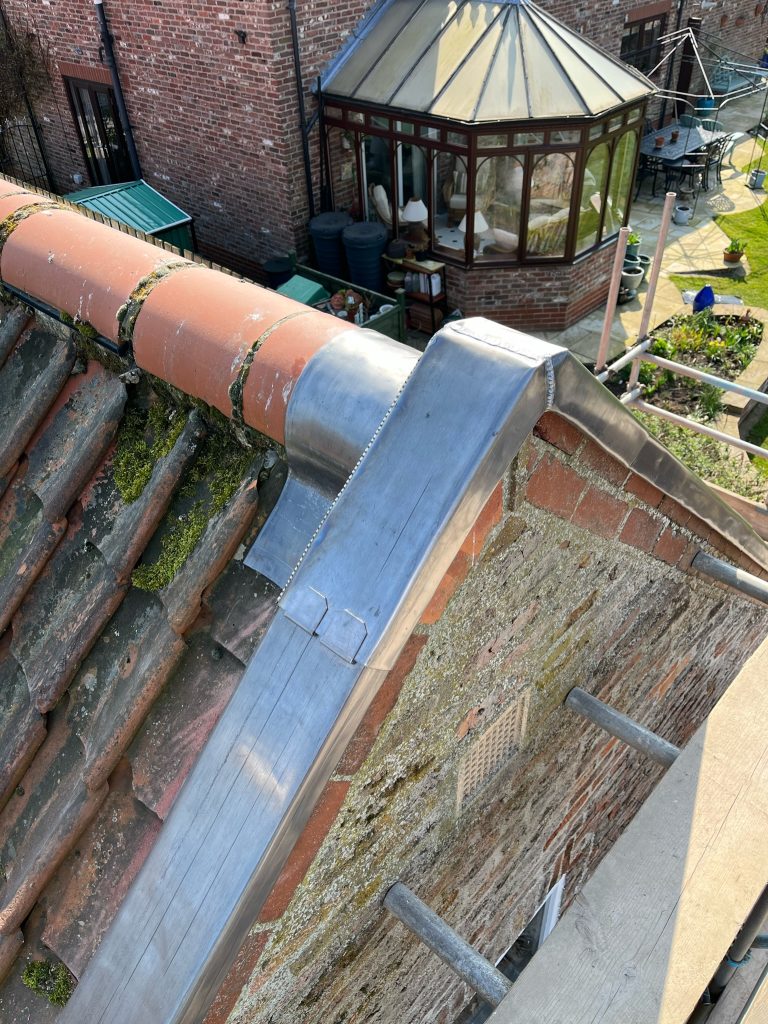
The exposed edge was mechanically restrained with a continuous stainless-steel clip, improving resistance to wind uplift without rigidly fixing the sheet and restricting its natural thermal movement.

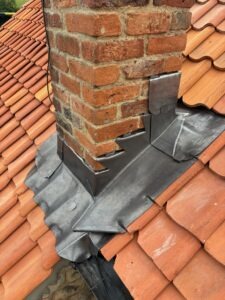
The original rigid weathering detail had cracked and deteriorated.

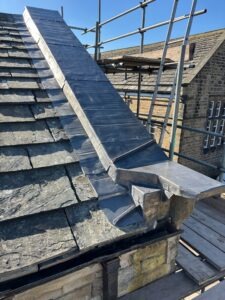
A continuous plywood support was installed before the new leadwork was formed.
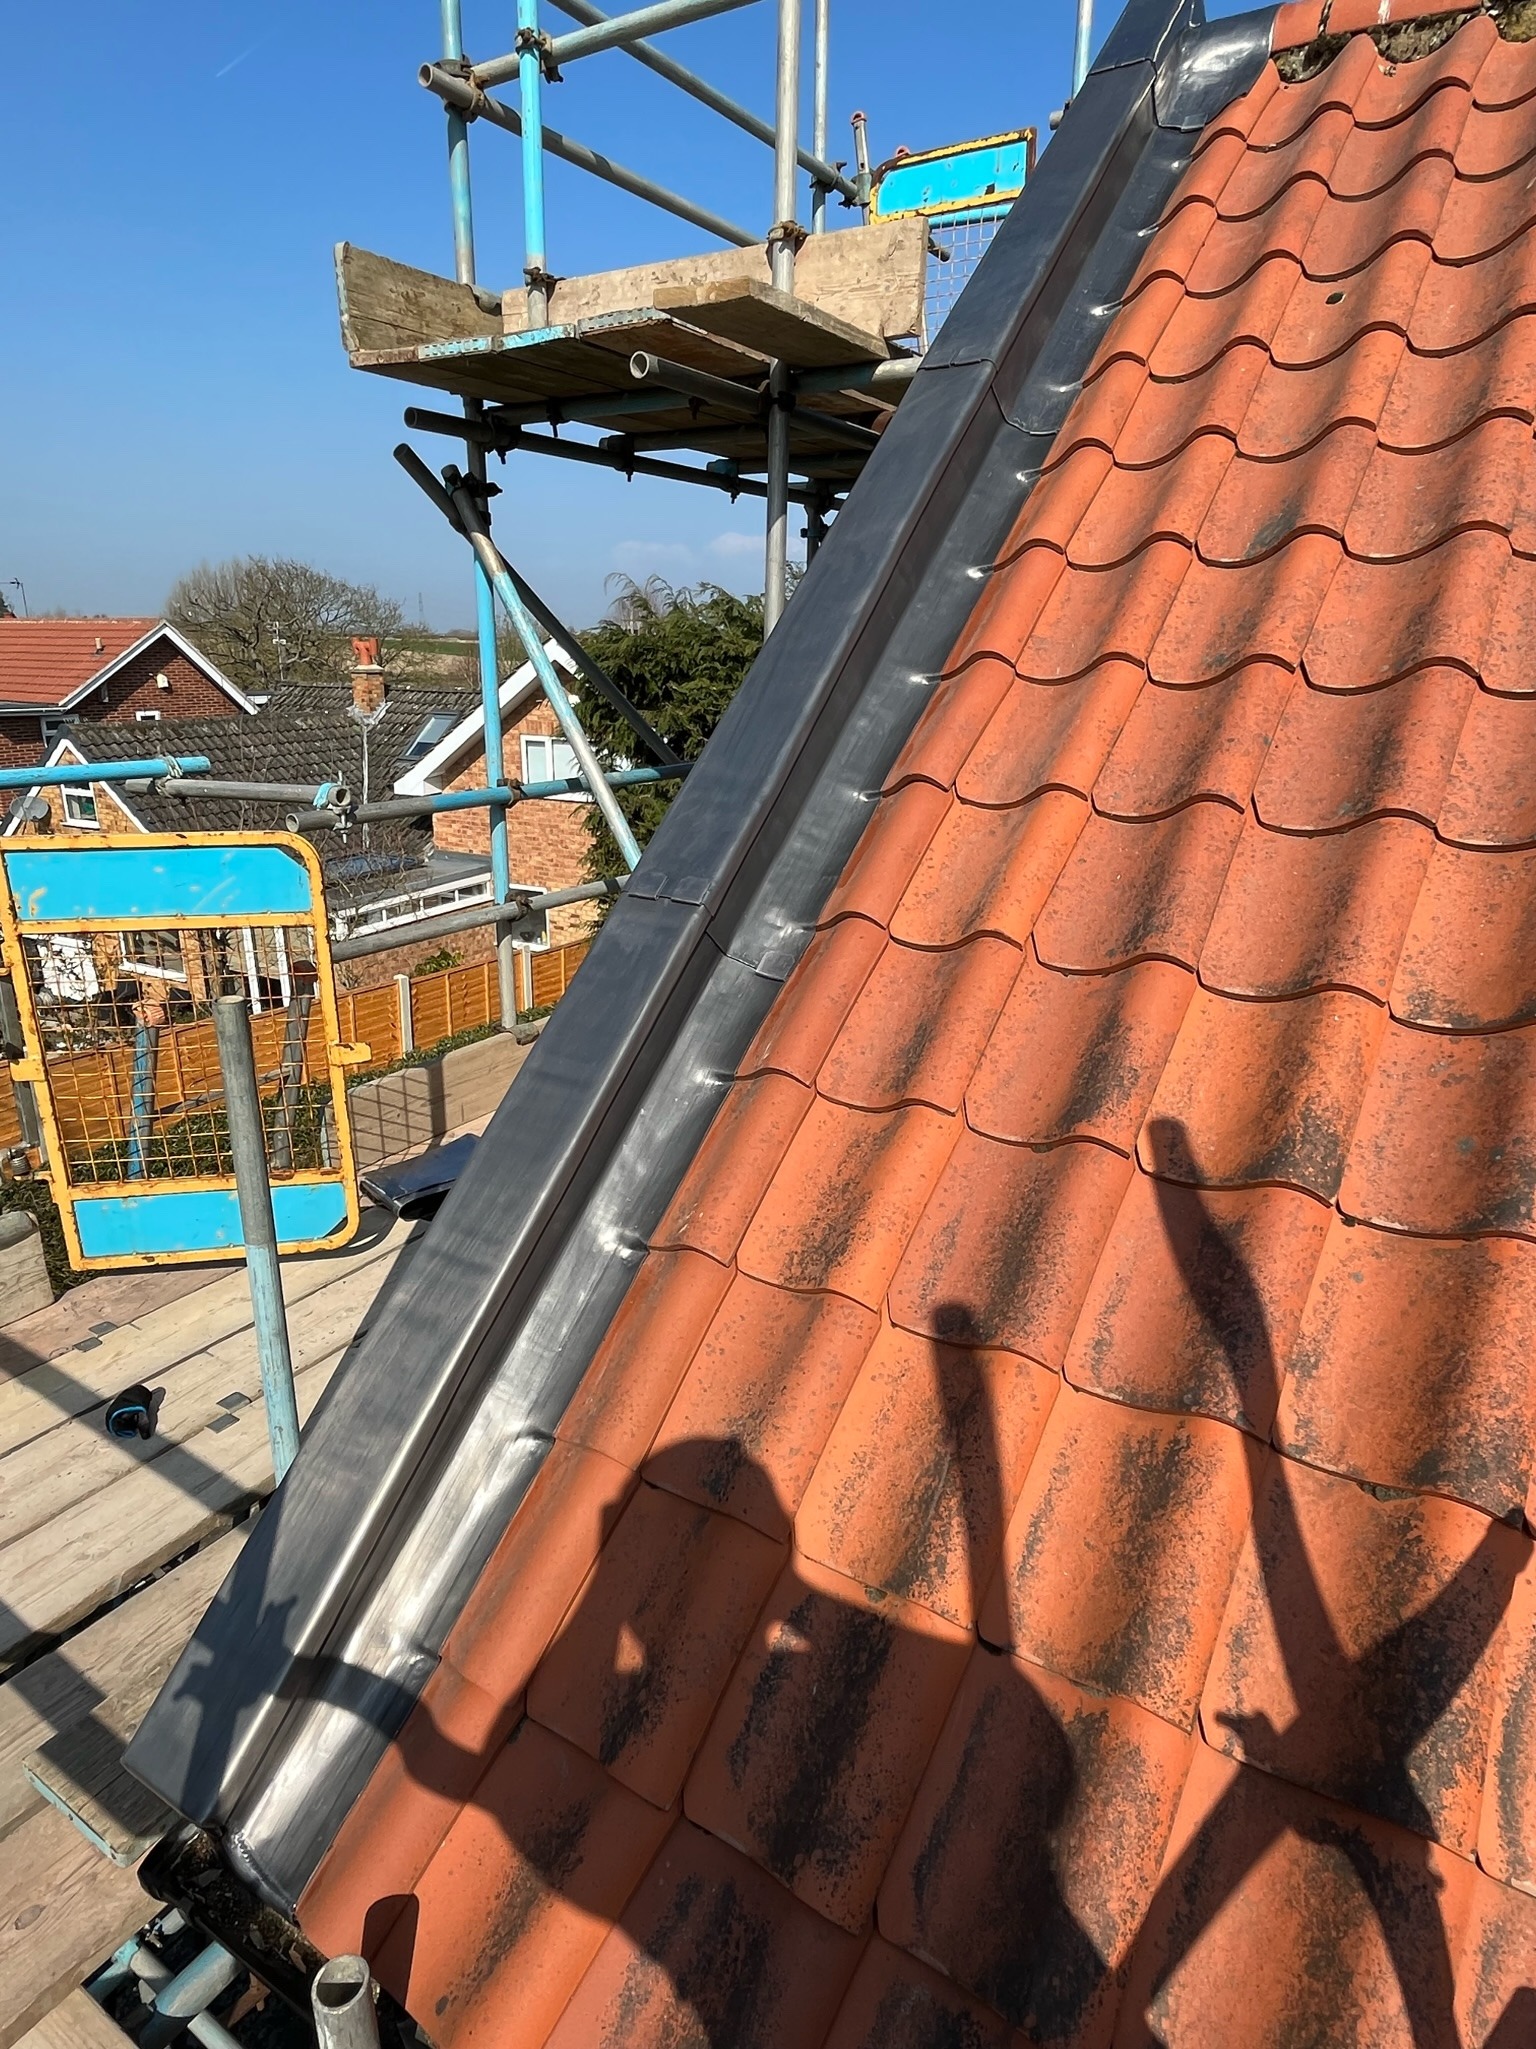
The finished Code 5 lead provides a continuous weathered termination to the wall head.
04 — WHY THE MORTAR FAILED
A wall head is exposed to repeated thermal and moisture-related movement. Masonry, mortar, timber and roof coverings do not all move at the same rate.
A rigid mortar fillet can therefore crack as the surrounding construction moves. Once a fissure develops, capillary action and wind-driven rain can introduce moisture behind the detail.
Repeated saturation then contributes to further mortar erosion, masonry weathering and decay in adjacent materials.
05 — WHY LEAD WORKS
Rolled lead sheet is particularly suited to wall heads and irregular masonry interfaces because it can be dressed accurately around changes in level and roof profile.
Unlike a rigid cement fillet, properly detailed lead can accommodate normal thermal movement while continuing to shed water away from the construction beneath.
06 — SUBSTRATE + SUPPORT
07 — LEADWORK INSTALLATION
08 — SIGNATURE DETAIL
The most exposed part of a lead capping is often its free edge.
Wind pressure can act beneath poorly restrained sheet and progressively distort or lift the edge. Simply increasing the number of direct fixings is not necessarily the answer, because excessive restraint can interfere with thermal movement.
On this project, a continuous stainless-steel clip was used to provide positive mechanical restraint while allowing the lead covering itself to remain correctly detailed for movement.
This small component is fundamental to the long-term performance of an exposed capping.

09 — MATERIALS
CODE 5 LEAD →
18MM PLYWOOD →
LEADWORK FIXINGS →
PATINATION OIL →
10 — LEAD SELECTION
Wall cappings can involve relatively broad pieces of sheet exposed to wind, temperature change and repeated wetting.
Code 5 was selected for this project to suit the dimensions and nature of the capping detail. The correct lead code on other projects should still be determined by the individual sheet size, geometry, exposure and fixing arrangement.
LEAD SIZING + ORDERING CHART →
LEAD WEIGHT CALCULATOR →
THE LEAD HANDBOOK →
11 — PROJECT RECORD
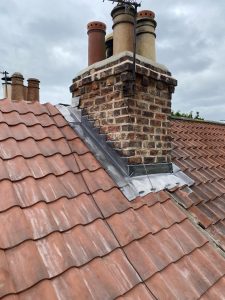
The photographic record shows the transition from a failed rigid mortar detail to a fully supported lead capping.
The construction-stage images are particularly important here because the plywood substrate and edge restraint are largely concealed once the finished leadwork is complete.


12 — WHAT THIS PROJECT SHOWS
The original mortar was not simply damaged; the underlying approach was vulnerable to recurring movement and exposure.
Replacing like-for-like would have restored the appearance without necessarily addressing the fundamental weakness.
By introducing a continuous substrate and formed lead capping, the repair created a different type of weathering detail: one capable of shedding water while accommodating normal movement in the building.
PROPERTY OWNER TAKEAWAYS
13 — FREQUENTLY ASKED
Lead is more flexible than mortar and can be detailed as an independent weathering layer, making it well suited to exposed wall heads and interfaces where some movement is expected.
Code 5 is suitable for many capping applications, but the final specification should be based on the sheet dimensions, exposure and detail rather than lead code alone.
Fully supported leadwork depends on a smooth, stable background. A suitable substrate helps preserve the intended profile and prevents local distortion of the sheet.
A properly designed clip provides mechanical restraint to exposed sheet edges and helps resist wind uplift without unnecessarily restricting normal lead movement.
14 — LEARN + BUY
The Lead Lads® project archive connects real installation details with the materials and technical guidance used to execute them.
Lead Roofing Projects →
Leadwork Standards →
Lead Sizing + Ordering Chart →
Rolled Lead Sheet →
Leadwork Fixings →
Lead Lads Shop →
THE LEAD LADS® / PROJECT ARCHIVE
The Poppleton wall capping forms part of The Lead Lads® archive documenting leadwork to roofs, masonry walls, chimneys, bays, gutters, valleys and architectural details.
Each project records not only the finished leadwork but the substrate, defects and construction decisions beneath it — showing why successful leadwork begins before the sheet is installed.