

THE LEAD LADS® / PROJECT ARCHIVE
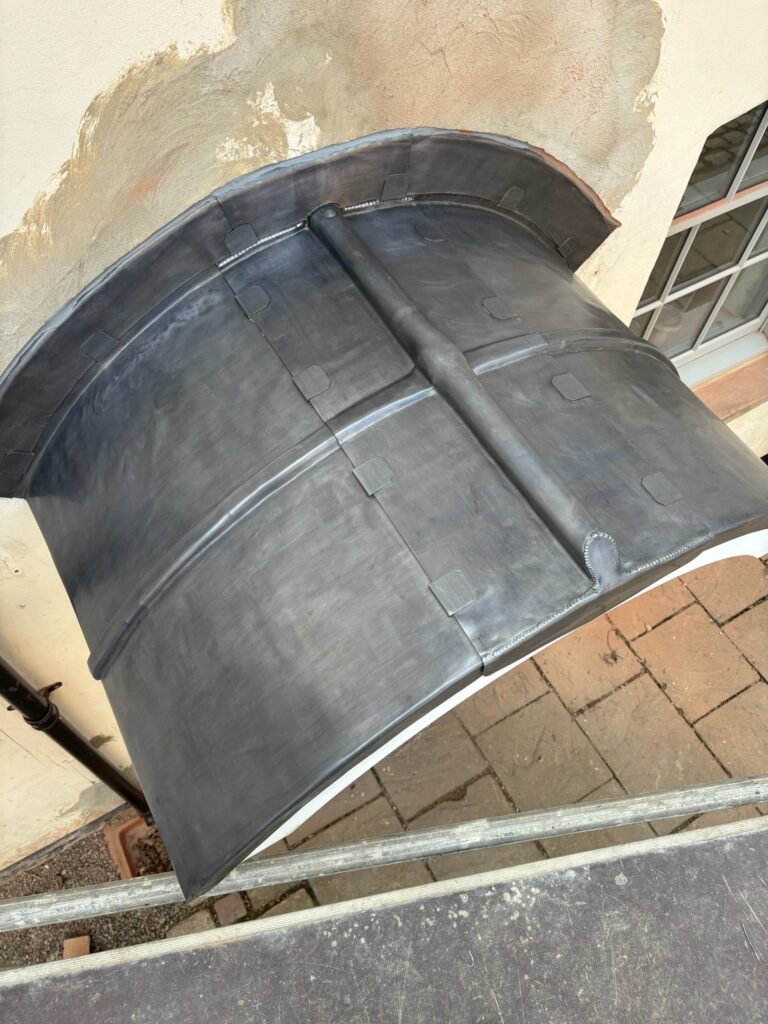
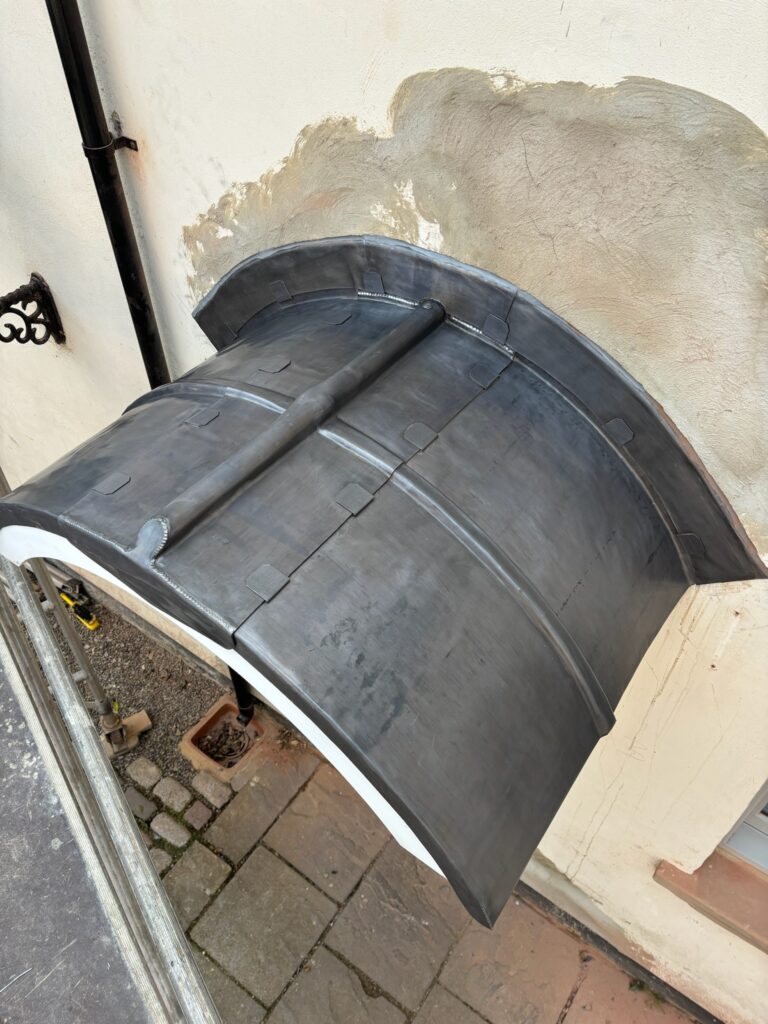
Renewal of a traditional curved lead entrance canopy at Loftus Hill in Ferrensby, North Yorkshire, incorporating fully supported Code 5 rolled lead sheet, welted panels, curved edge details and new masonry flashings.
FERRENSBY · NORTH YORKSHIRE · GRADE II LISTED · CURVED LEADWORK
Explore the Project01 — THE PROJECT
The Lead Lads® renewed the curved lead entrance canopy at Loftus Hill, a Grade II listed country house in Ferrensby, North Yorkshire.
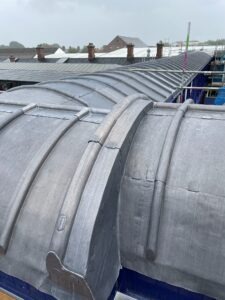
The canopy forms an important part of the architectural composition of the entrance. Its shallow barrel-vault profile projects from the masonry façade, providing shelter to the doorway while creating a distinct traditional feature within the elevation.
The replacement work therefore required more than simply making the canopy watertight. The original form, curved geometry, joint layout and architectural character all had to be respected while creating a durable new weathering system.
SPECIALIST LEADWORK →
LEADWORK STANDARDS →
ROLLED LEAD SHEET →
LOCATION
PROGRAMME
LEAD CODE
DESIGNATION
02 — THE CANOPY
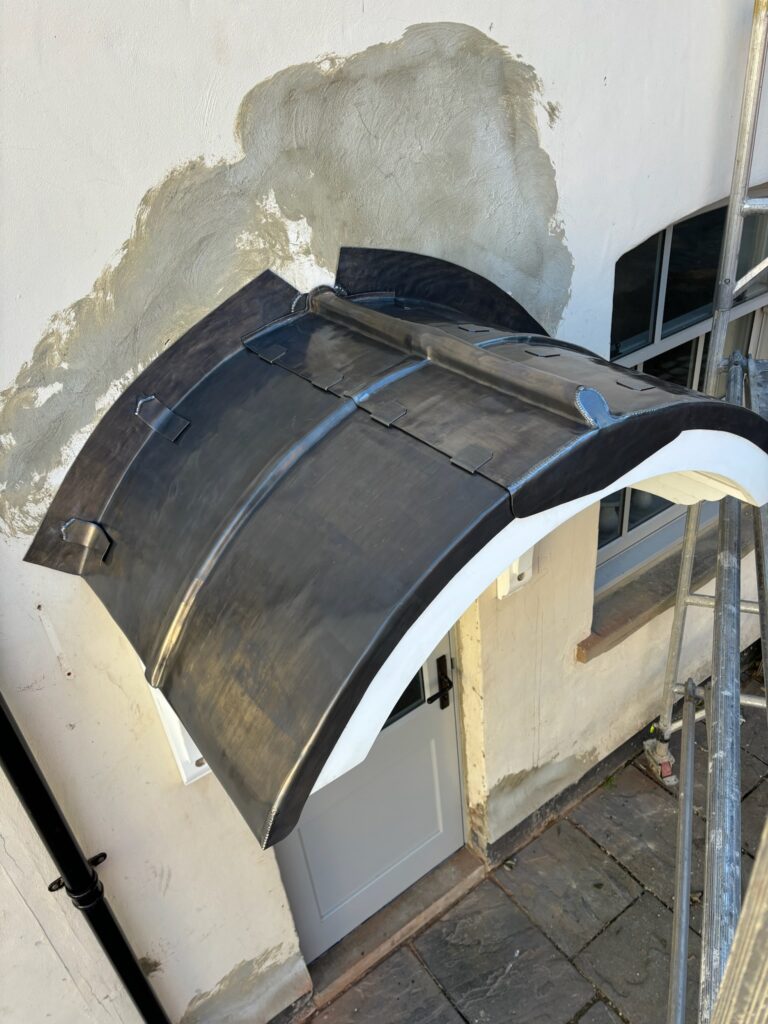
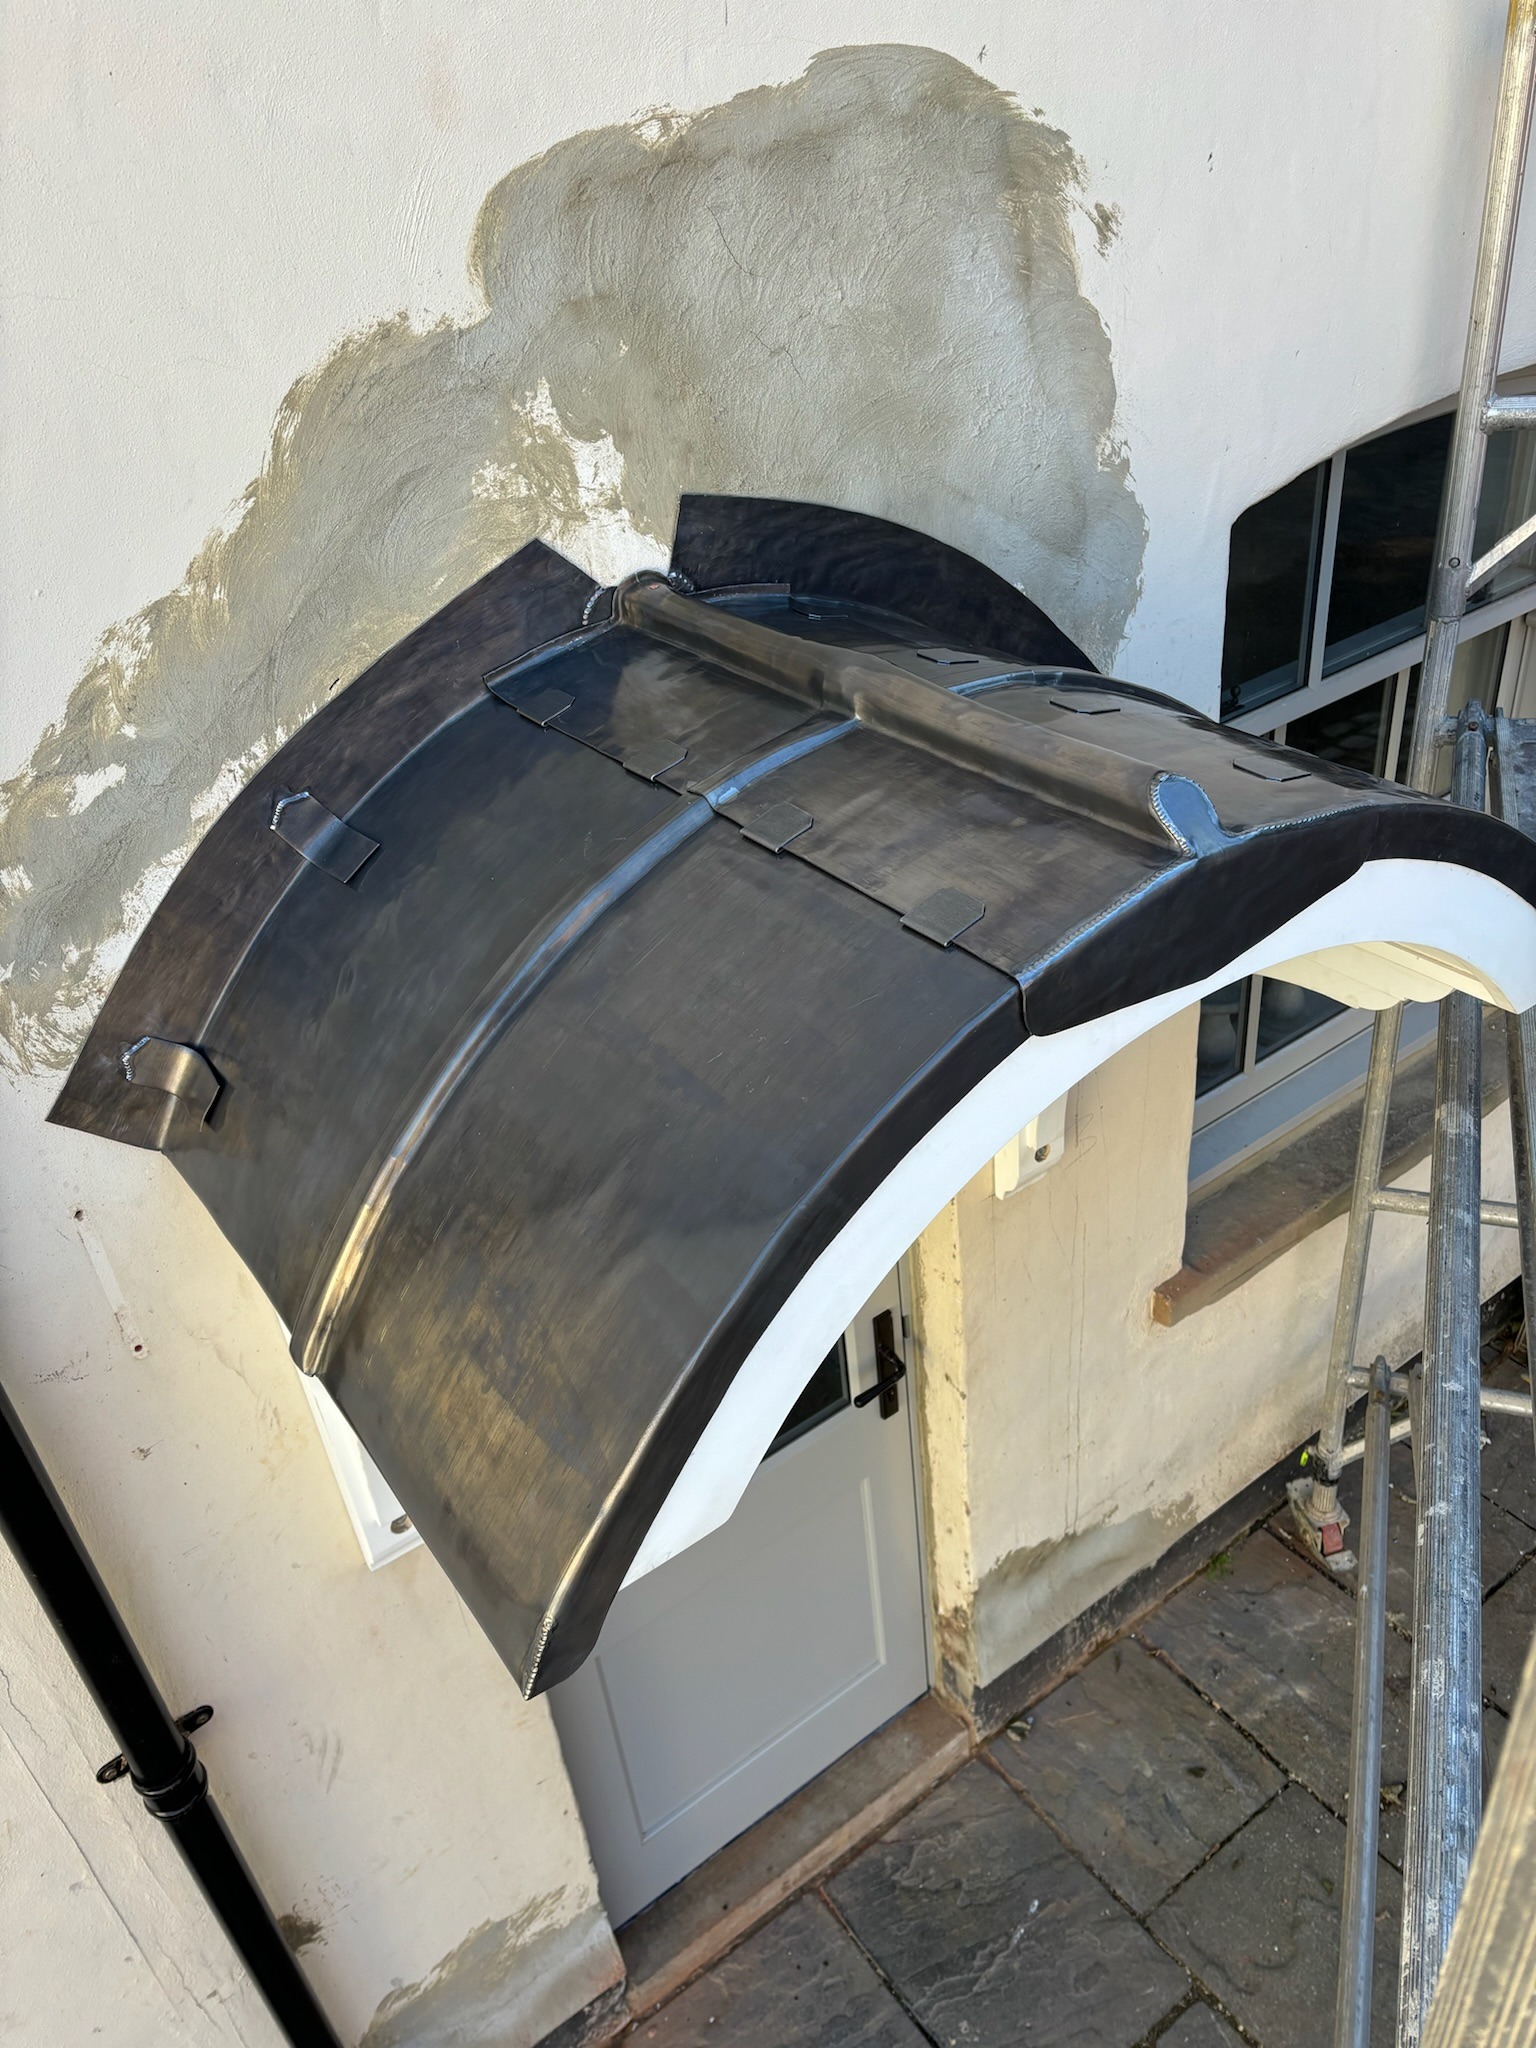
The canopy is formed as a shallow barrel-vaulted hood projecting from the external wall above the principal entrance.
Its curvature gives the feature much of its character, but also makes the leadwork considerably more demanding than a flat canopy. Every piece must sit accurately against the curved substrate while the joints, edges and abutment flashings continue to shed water correctly.
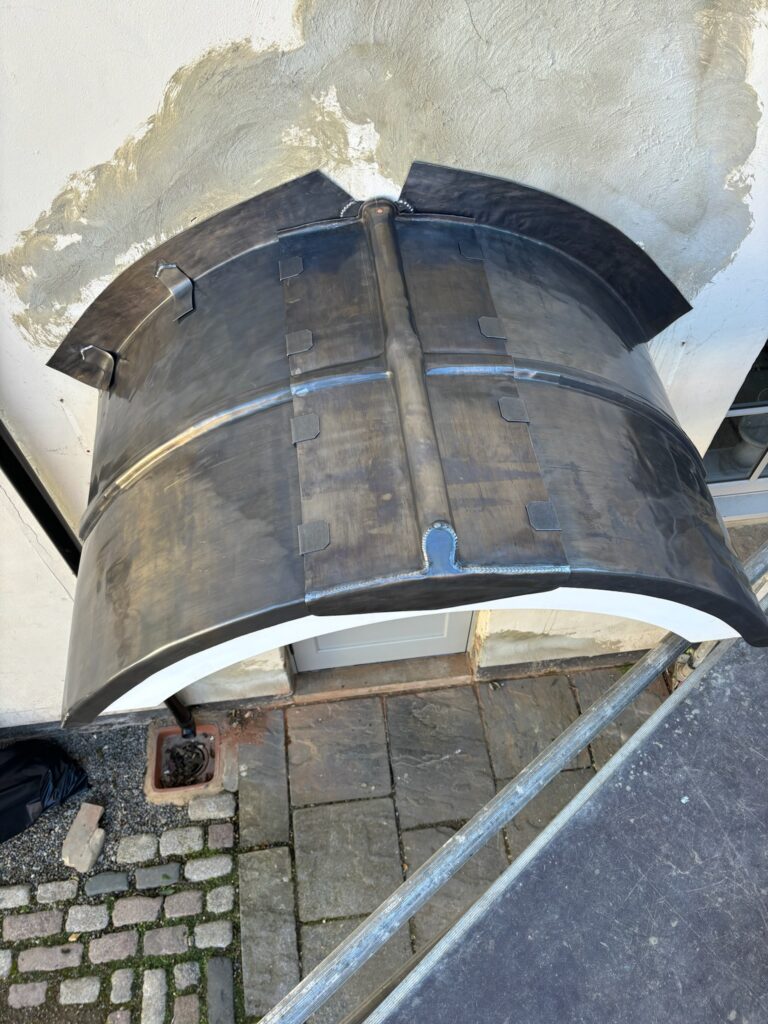
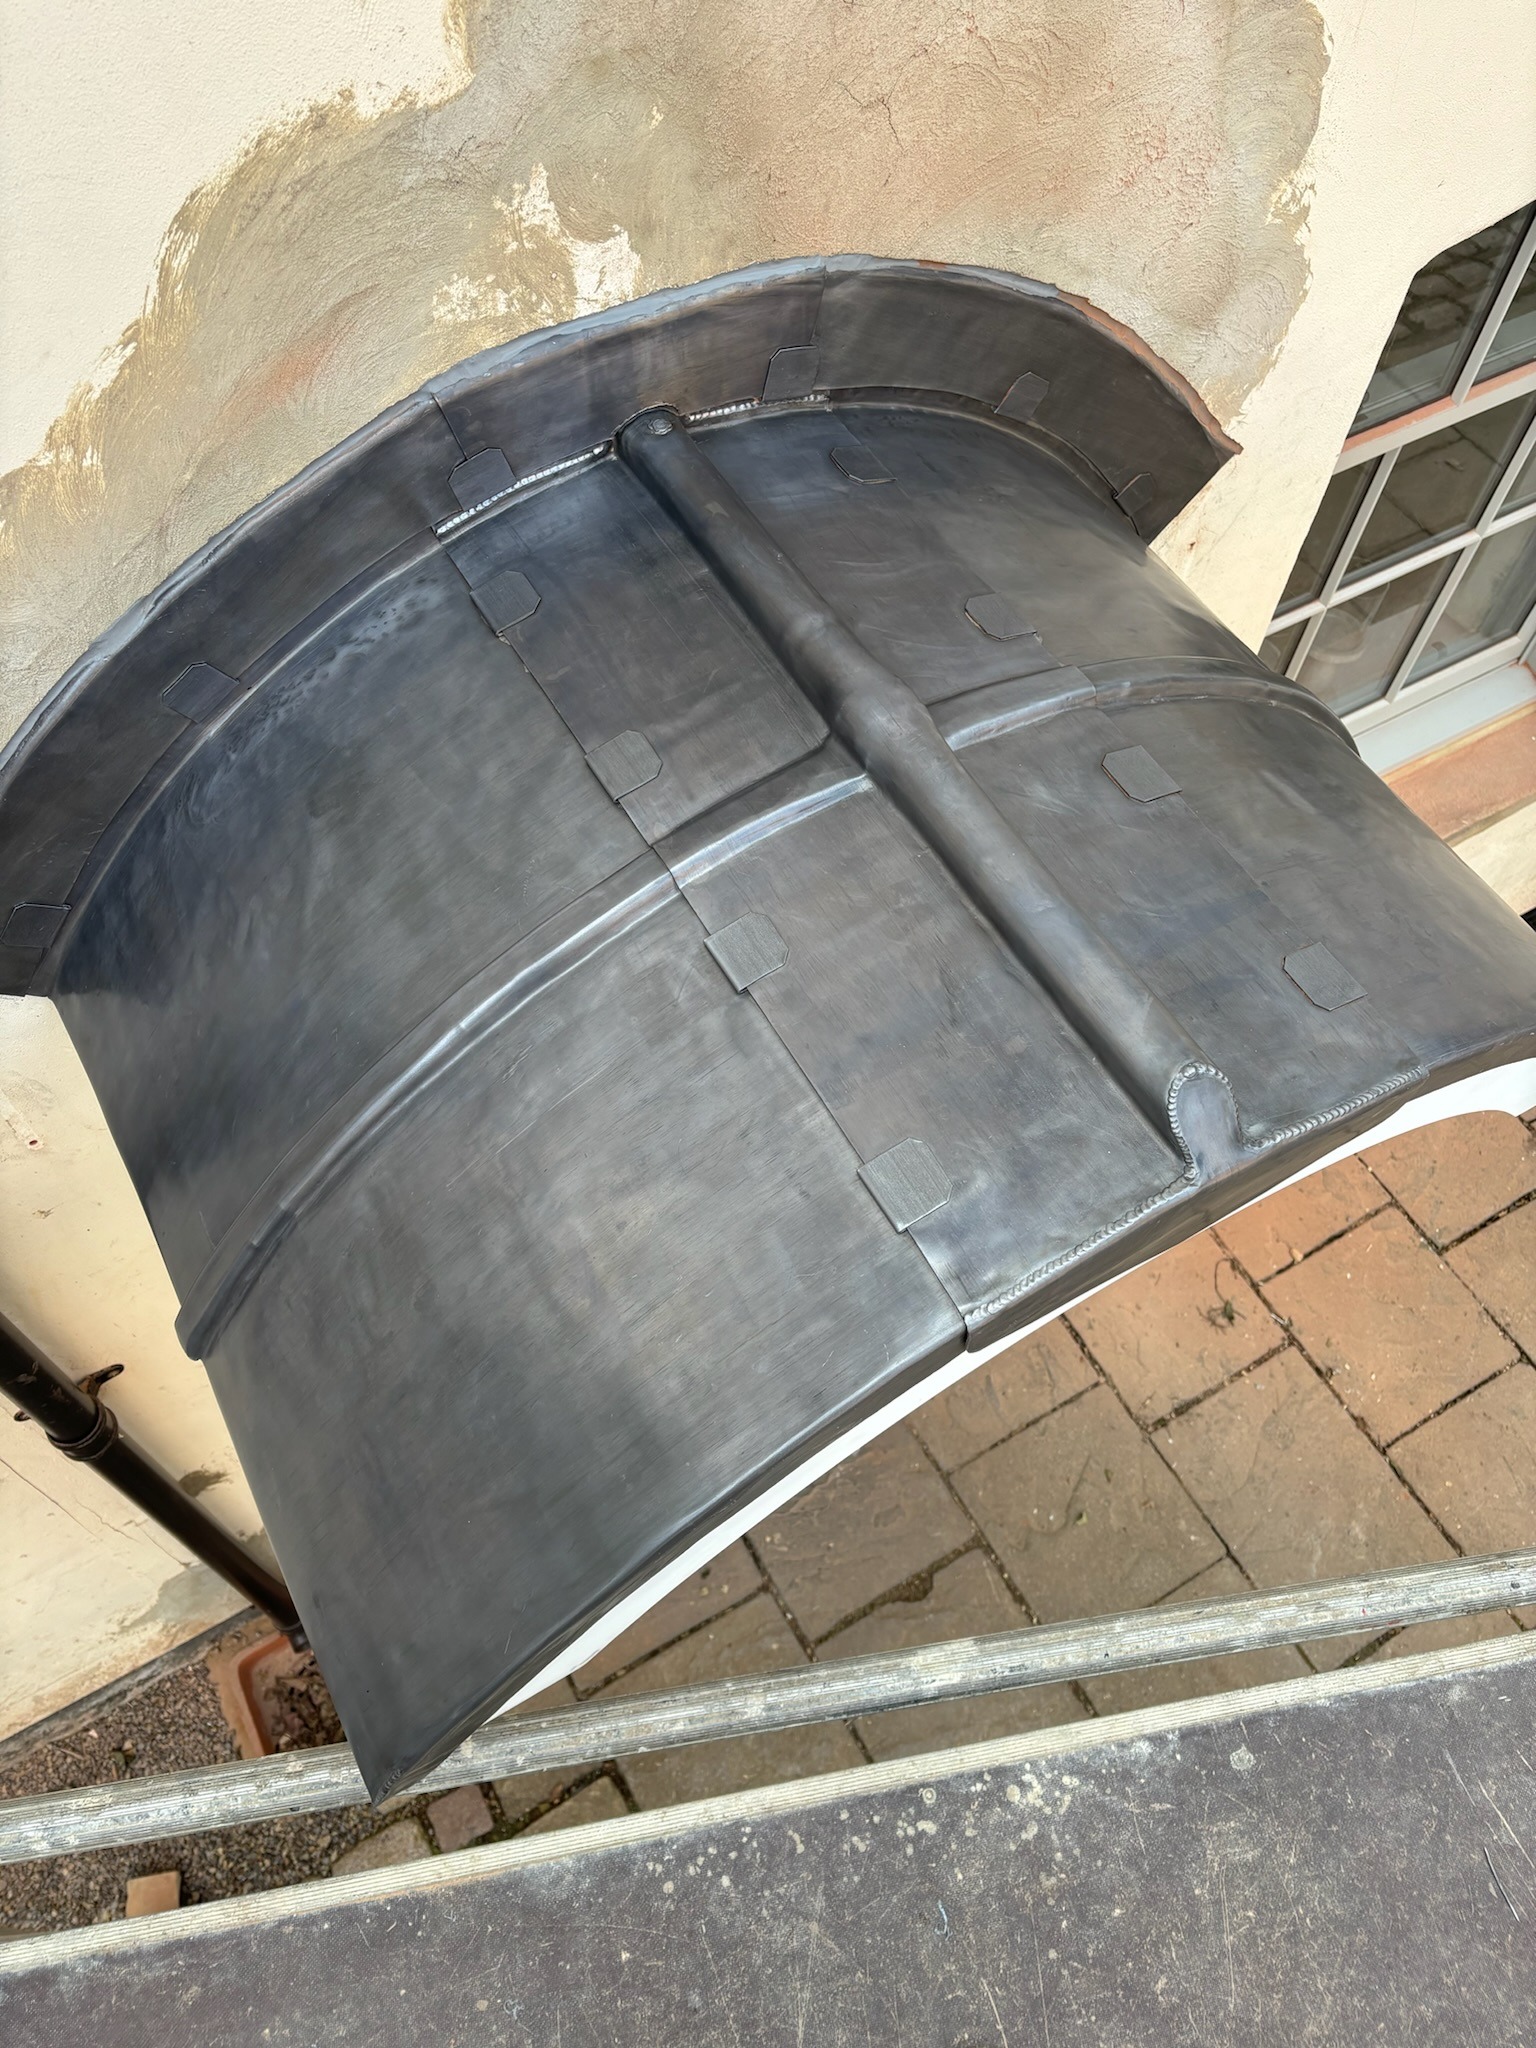
The covering also includes traditional welted joints and raised detailing that contribute both to the appearance of the canopy and to the division of the lead into manageable sections.
03 — CONSERVATION APPROACH
On a listed building, the objective is not simply to create a new waterproof covering. The form and visual character of the existing architectural element also matter.
The replacement leadwork was therefore formed around the established profile of the canopy while improving the condition of the supporting construction and renewing the weathering interfaces.
This approach allows the historic entrance composition to remain visually familiar while replacing deteriorated materials with a properly supported new lead covering.
BS 6915 Leadwork →
The Lead Handbook →
Lead Roofing Guides →

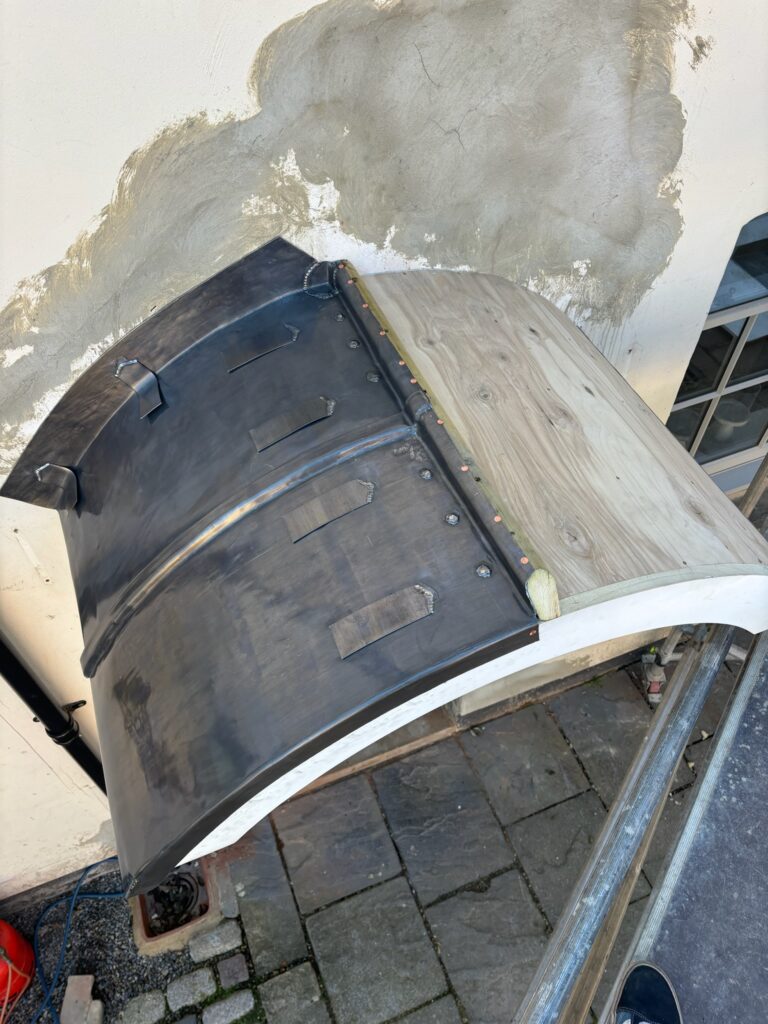
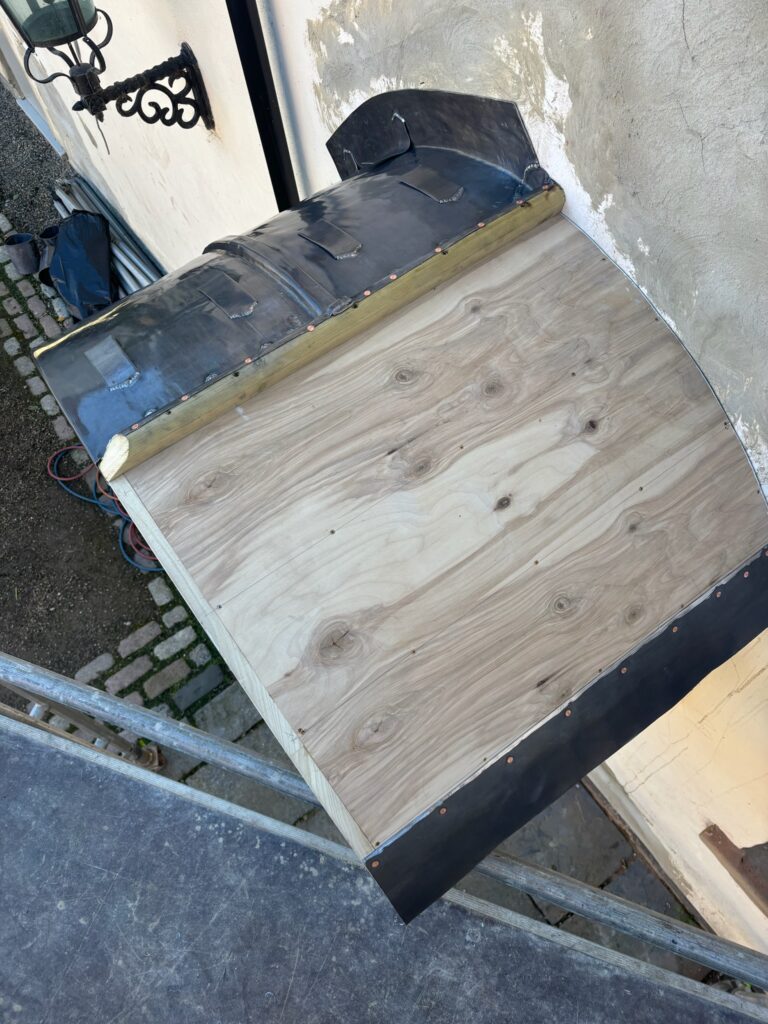
The supporting deck establishes the barrel-vault geometry beneath the new lead covering.
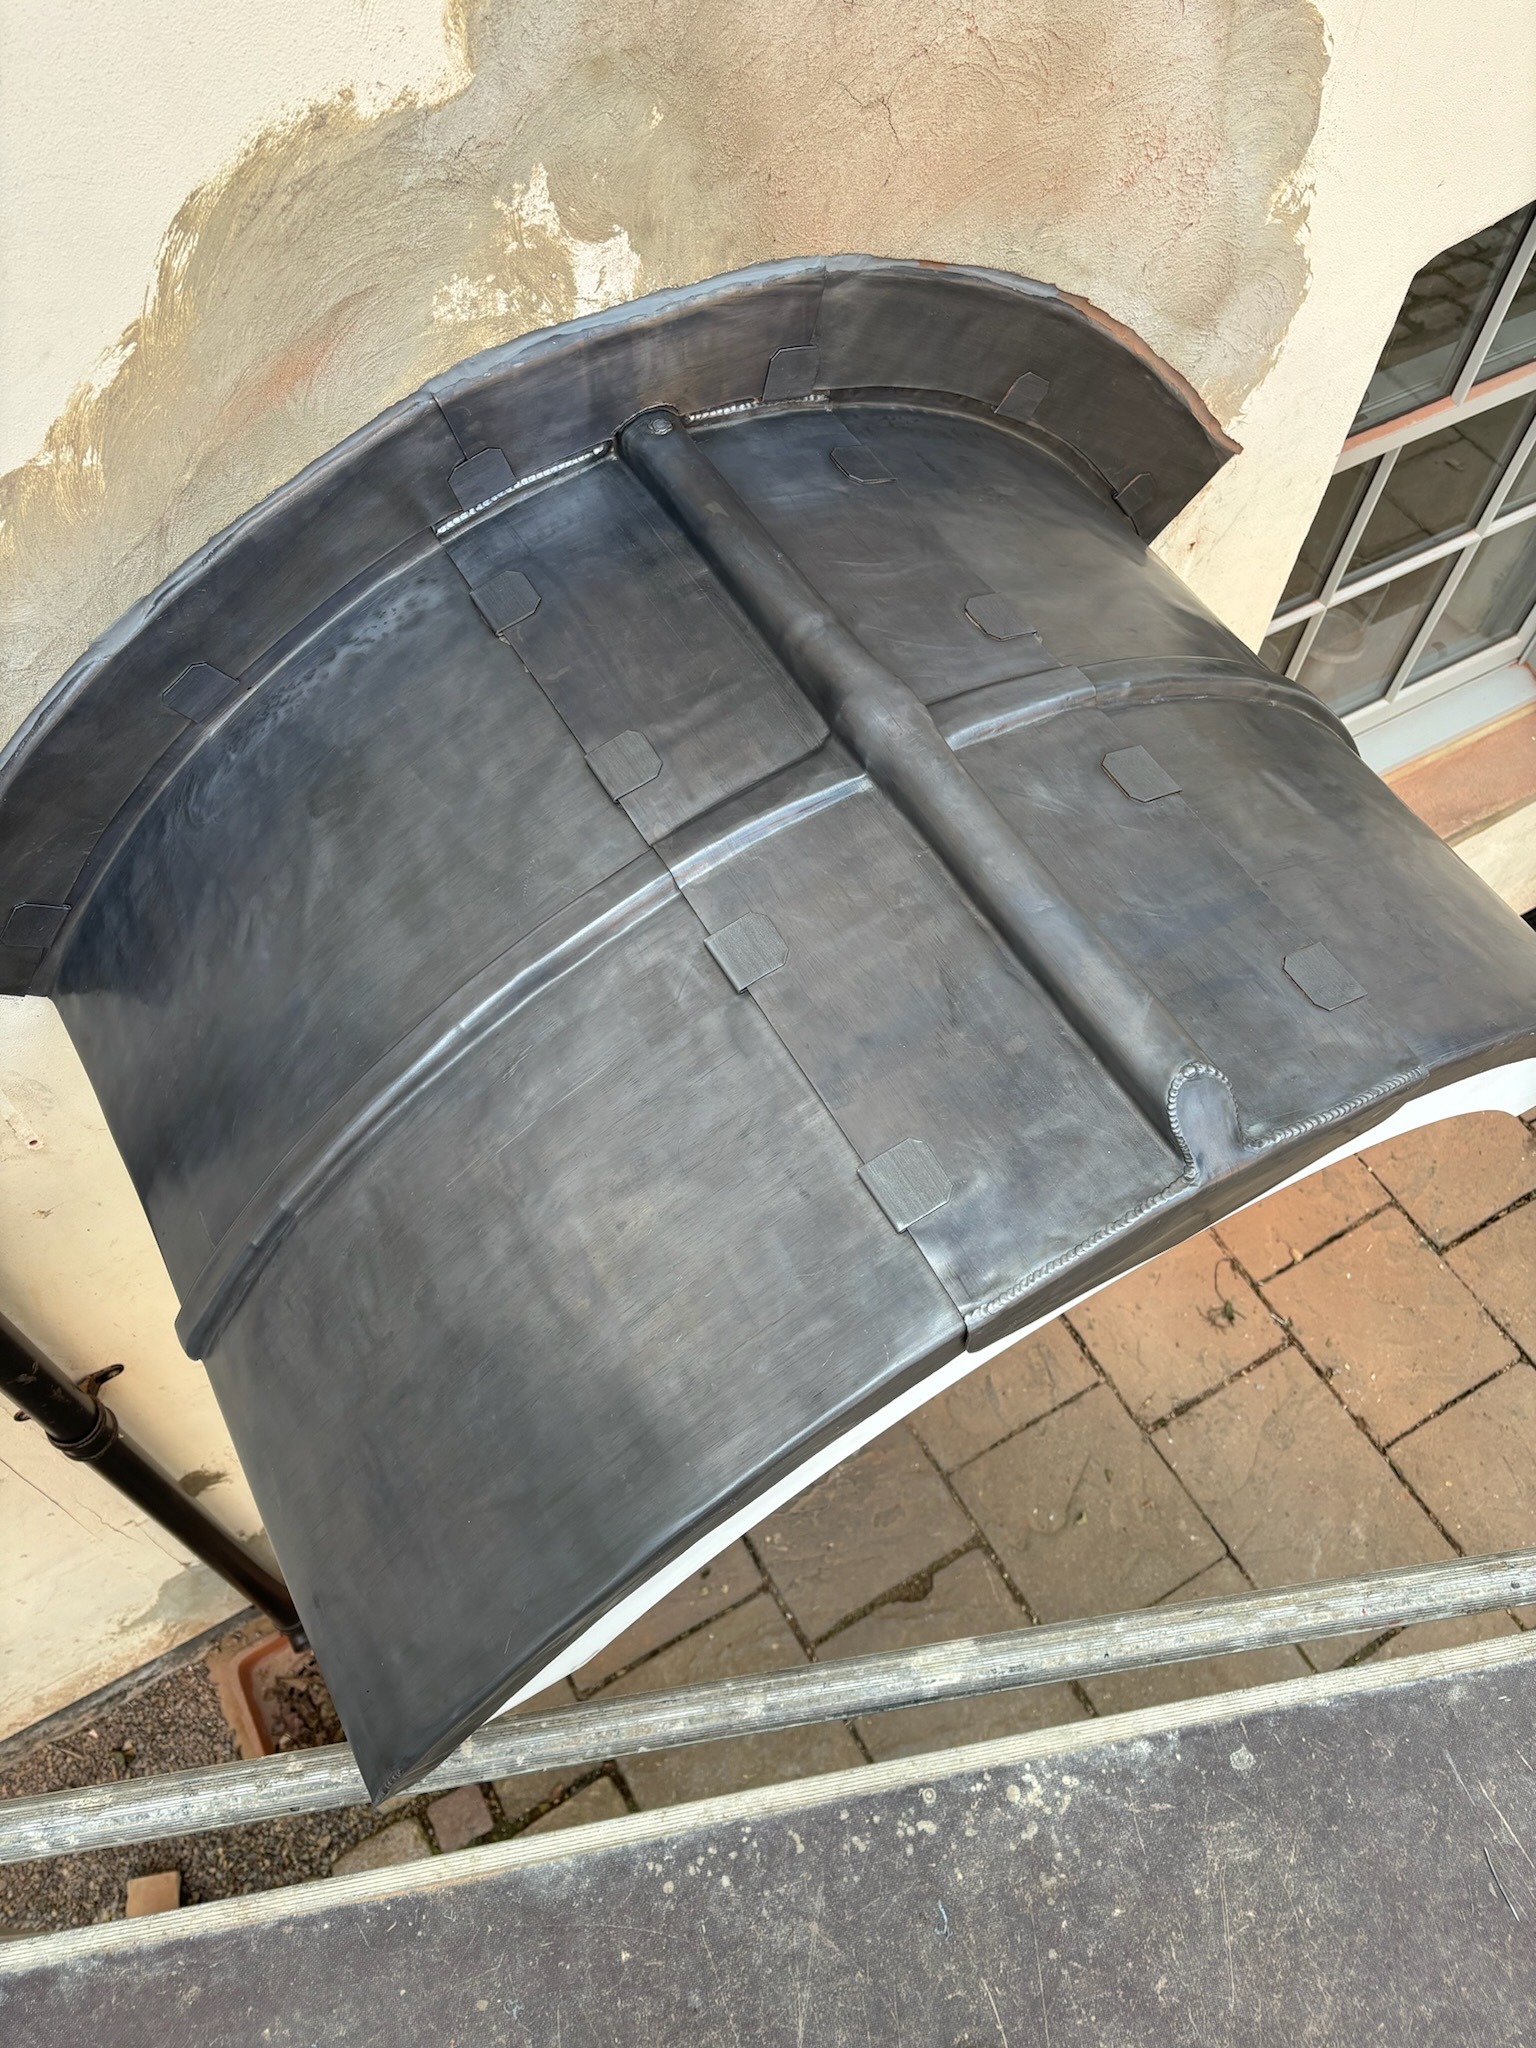
Individual sheet sections are dressed carefully to follow the curved form.
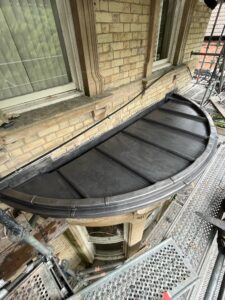
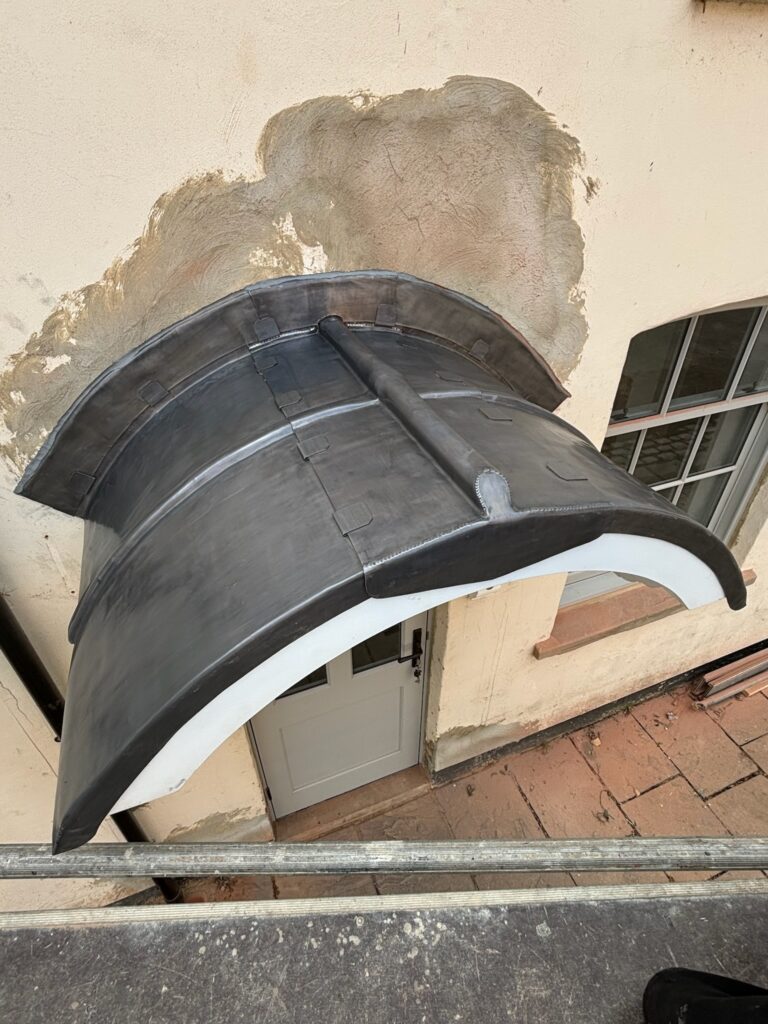
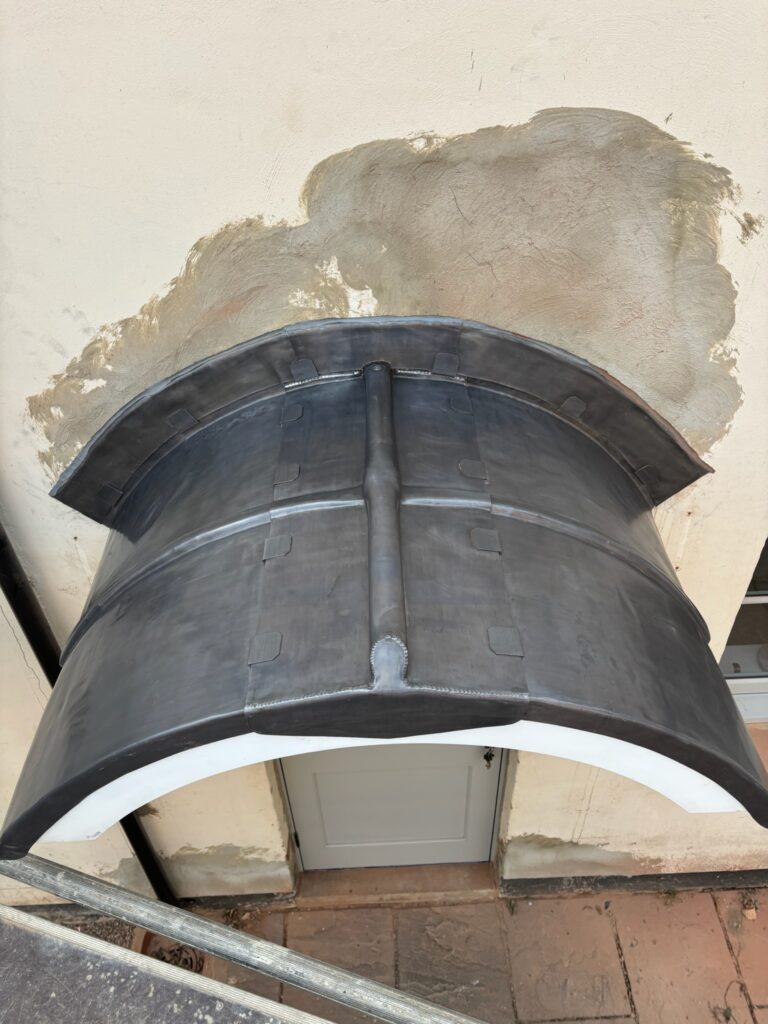
The finished leadwork preserves the traditional entrance profile while providing renewed weather protection.
04 — SUPPORTING CONSTRUCTION
The finished quality of curved leadwork is heavily influenced by the substrate beneath it.
The timber deck must provide a smooth, continuous version of the required profile. Any irregularity or change in line beneath fully supported lead sheet can be reflected through the finished surface.
05 — LEADWORK CRAFT
The lead was divided into appropriately sized sections and progressively dressed to the curved substrate.
Traditional leadworking techniques were used to retain clean lines around the curved form while allowing separate pieces of sheet to respond independently to thermal movement.
06 — SIGNATURE DETAIL
The canopy’s curved form is what makes the detail architecturally distinctive.
Unlike a flat roof, where the lead primarily follows a single plane, a barrel-vaulted canopy requires the sheet to be dressed consistently across a continuously changing surface.
The joint arrangement must complement that geometry rather than fight it. Welted panels and carefully formed edges divide the covering into workable sections while maintaining the visual flow of the canopy.
The result should appear simple when complete, even though achieving that simplicity requires precise substrate formation and careful lead dressing.

07 — PREPARATION + SUBSTRATE
08 — LEADWORK INSTALLATION
09 — MATERIALS
ROLLED LEAD SHEET →
LEADWORK FIXINGS →
LEAD UNDERLAY →
PATINATION OIL →
10 — MOVEMENT + FIXING
Lead sheet expands and contracts as its temperature changes. The fixing strategy therefore has to secure the covering against displacement without preventing normal sheet movement.
On this relatively sheltered canopy, compatible leadwork clips and non-ferrous fixings were used as part of the detailing rather than attempting to rigidly pin the entire sheet to the substrate.
The joint layout itself also helps control movement by breaking the covering into smaller sections.
LEAD SIZING + ORDERING CHART →
LEAD WEIGHT CALCULATOR →
THE LEAD HANDBOOK →
11 — PROJECT RECORD
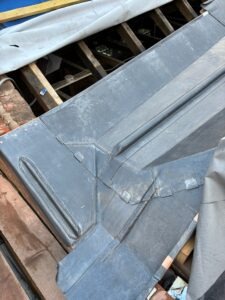
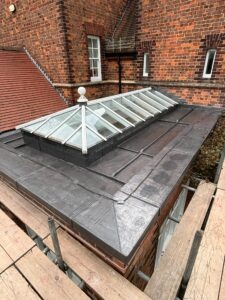
The project imagery records the canopy during construction and after completion, showing how the individual sheets build up the finished curved form.
The construction-stage photographs are particularly useful for understanding the relationship between the substrate, panel layout, edge details and masonry flashings.
12 — THE BUILDING
Loftus Hill is a Grade II listed country house in Ferrensby, North Yorkshire, with fabric dating from the late seventeenth century and later nineteenth-century alterations.
The building’s traditional materials and architectural composition make smaller elements such as the entrance canopy important to the character of the whole elevation.
The lead canopy is therefore both practical and decorative: it shelters the doorway and masonry while emphasising the entrance within the façade.
13 — WHAT THIS PROJECT SHOWS
A door canopy is modest in area compared with a complete roof, but its position directly above an entrance makes every line and detail highly visible.
The success of the work depends upon the same principles as much larger lead roofs: sound support, appropriate sheet sizing, controlled movement, reliable weathering and accurate workmanship.
On a listed building, those technical requirements are combined with another objective — retaining the visual form and character that make the detail worth preserving.
14 — LEAD CANOPY PRINCIPLES
Good curved leadwork is not produced by forcing sheet over an approximate shape.
The supporting structure, timber deck, sheet layout, movement strategy and edge details all need to be resolved before the finished surface is formed.
Once those elements are correct, the lead can follow the architecture naturally and the completed canopy appears simple and coherent.
PROPERTY OWNER TAKEAWAYS
15 — FREQUENTLY ASKED
Where deterioration is widespread across the sheet, joints, flashings or supporting structure, complete renewal may be more appropriate than repeated local repairs.
The correct specification depends on the dimensions, bay sizes, geometry and exposure of the particular canopy. Code 5 was used on this project, but other canopy designs may require a different specification.
Smaller correctly detailed sections help accommodate thermal movement and reduce the stresses that can lead to fatigue cracking in oversized sheets.
Works affecting historic fabric or the character of a listed building can require listed building consent. The requirement should be established for the individual project before works proceed.
16 — LEARN + BUY
The Lead Lads® project archive connects completed leadwork with the standards, materials and practical guidance behind it.
Lead Roofing Projects →
Leadwork Standards →
The Lead Handbook →
Lead Sizing + Ordering Chart →
Rolled Lead Sheet →
Leadwork Fixings →
THE LEAD LADS® / PROJECT ARCHIVE
The Loftus Hill canopy forms part of The Lead Lads® project archive documenting lead roofs, canopies, bays, gutters, flashings and architectural leadwork on buildings across the UK.
The archive records the construction beneath the finished sheet as well as the visible result — showing how geometry, substrate, movement and traditional workmanship come together in completed leadwork.