



THE LEAD LADS® / PROJECT ARCHIVE
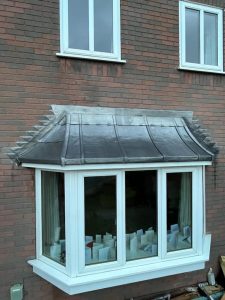
Replacement Code 5 leadwork to a curved bay roof in Harrogate, formed over a renewed supporting deck with timber core rolls, welted perimeter details and stepped lead flashings into the adjoining stone masonry.
HARROGATE · NORTH YORKSHIRE · CODE 5 LEAD · CURVED BAY ROOF
Explore the Project01 — THE PROJECT
This project at Granby Road in Harrogate involved renewal of the lead weathering to a prominent projecting bay on a traditional stone property.
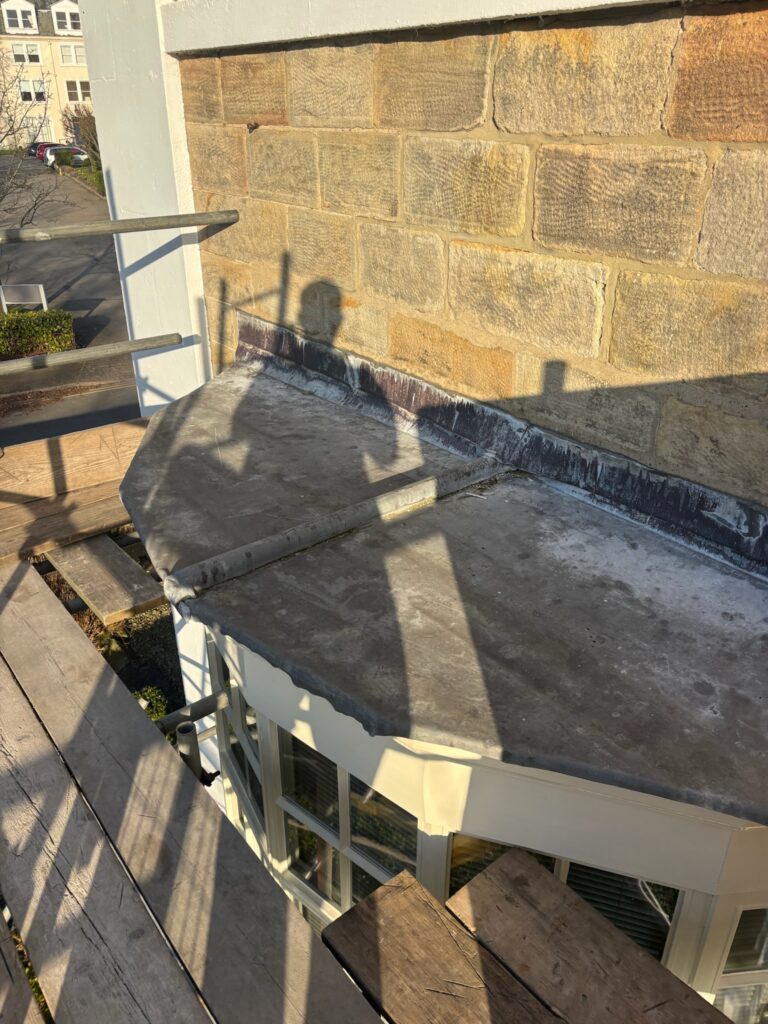
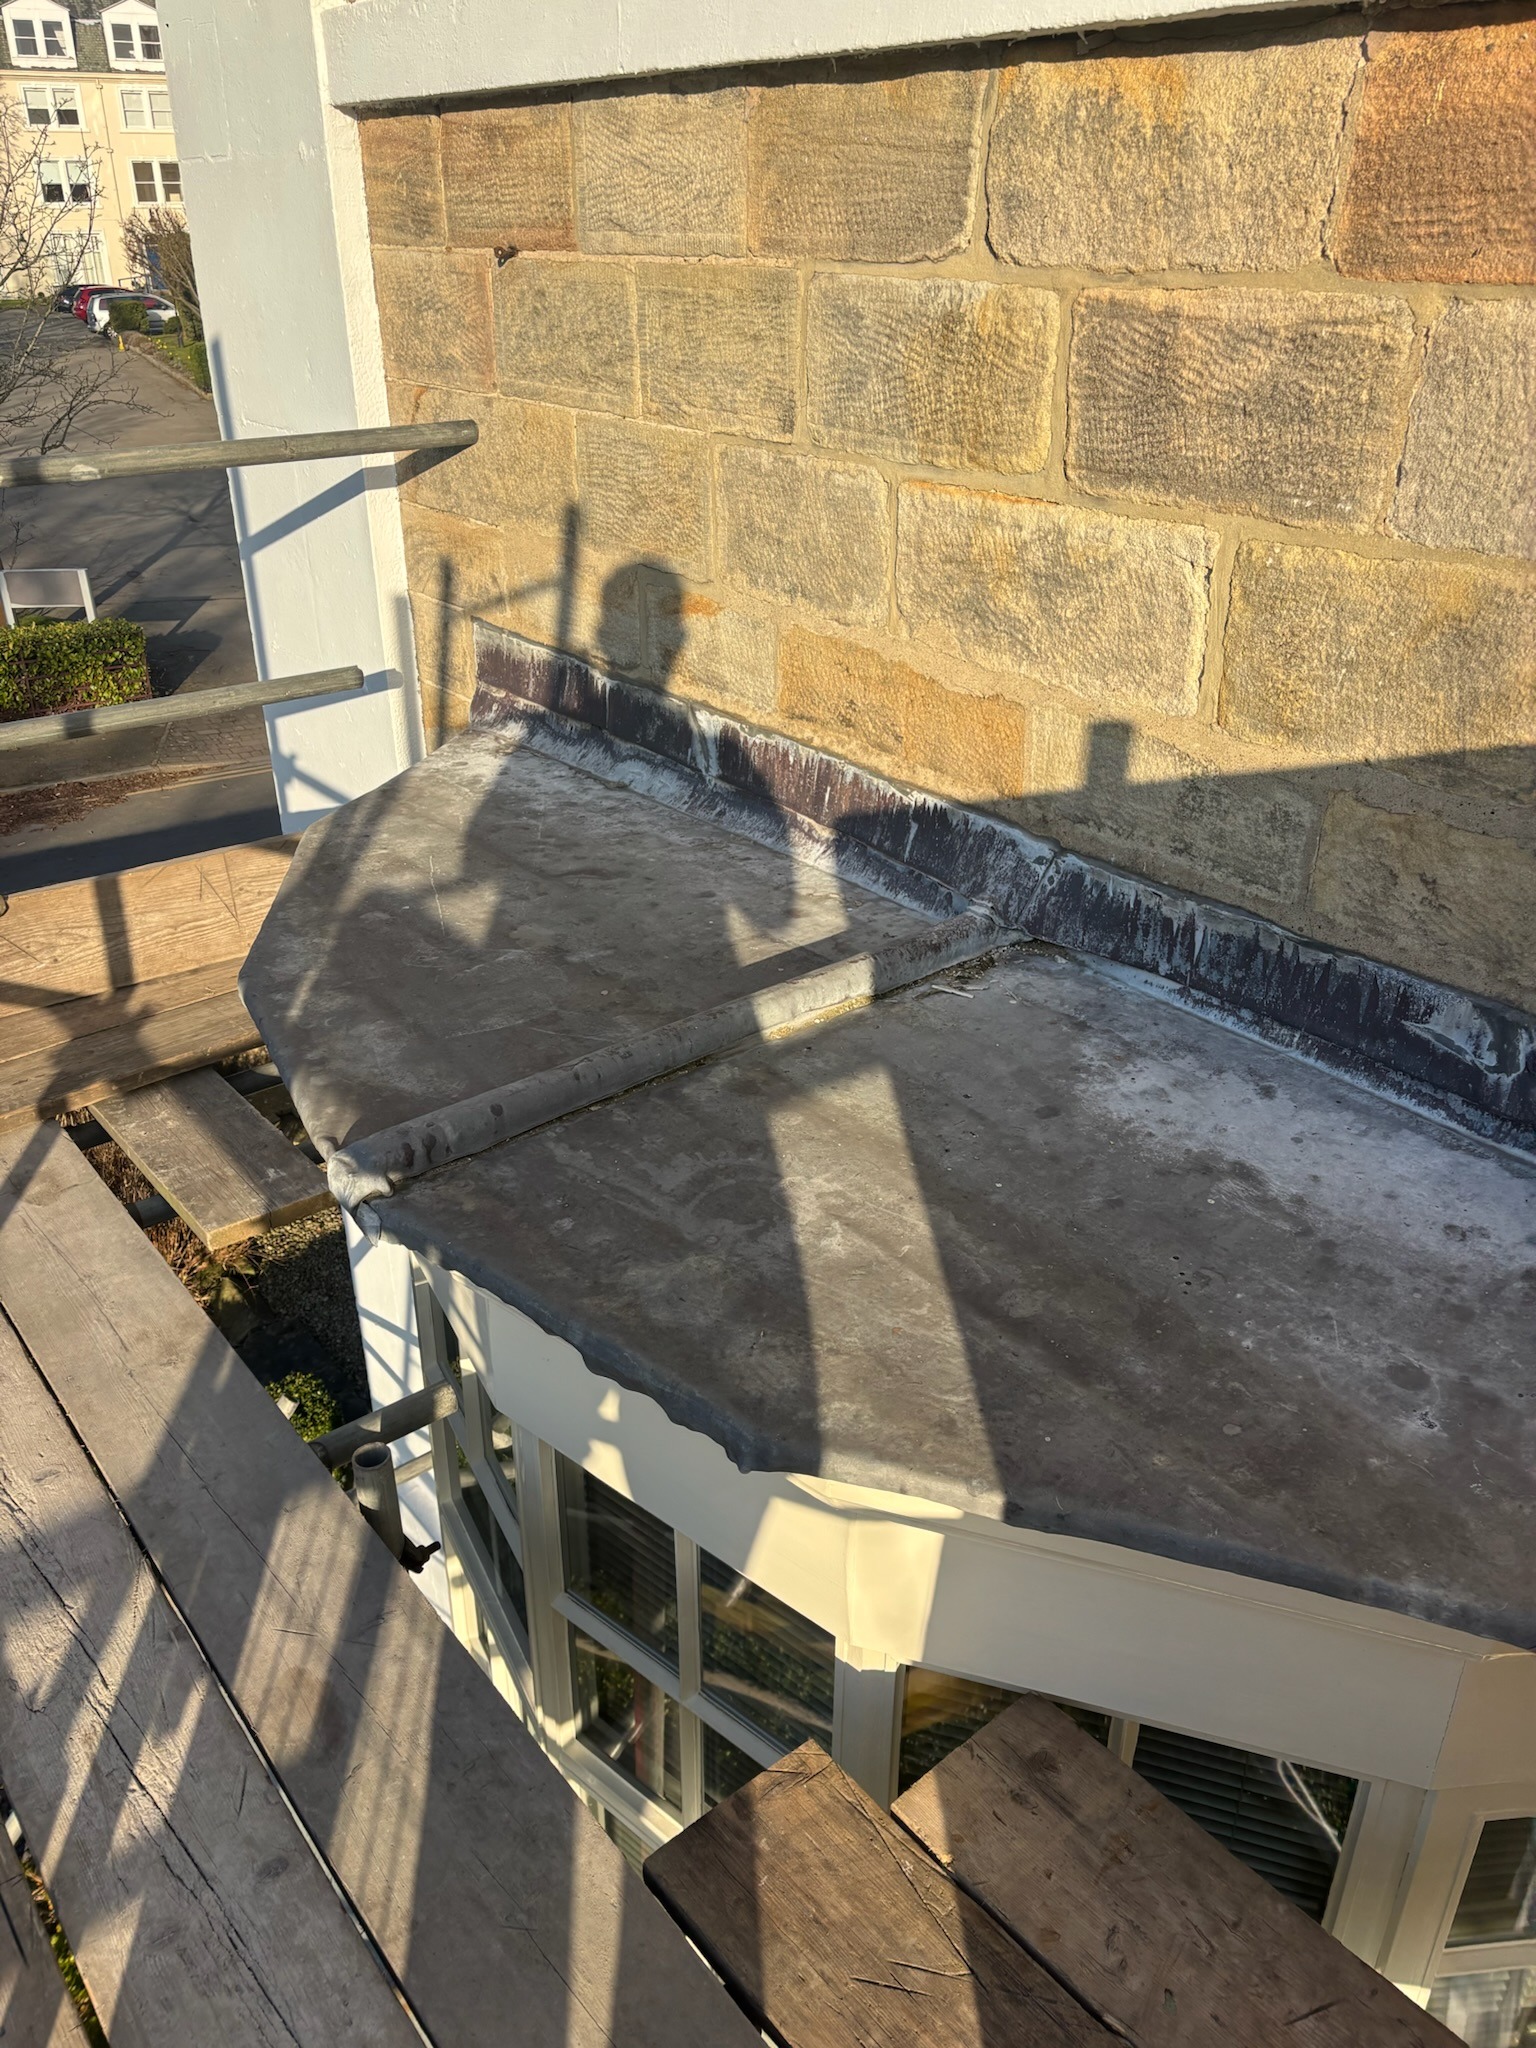
Unlike a simple flat bay, the roof geometry is curved and divided by raised timber rolls. The lead therefore has to follow the architectural form while remaining divided into manageable sections capable of normal thermal movement.
The completed system combines Code 5 rolled lead sheet, timber core rolls, perimeter weathering and stepped flashings at the masonry abutment to produce one coherent roof detail.
LEADWORK HARROGATE →
LEAD BAYS GUIDE →
LEAD BAY ROOF GUIDE →

LOCATION
PROGRAMME
LEAD CODE
ROOF FORM
02 — THE GEOMETRY
The character of this roof comes from the projecting curved form beneath it.
Rather than trying to force a broad sheet across the complete bay, the roof is divided into individual lead sections using raised timber rolls. The rolls organise the sheet layout while allowing the covering to follow the curve in a controlled sequence.
At the rear, the roof meets the stone elevation. This introduces another important detail: the horizontal covering has to transition into stepped flashings formed into the masonry above.
03 — TECHNICAL APPROACH
The timber rolls form the organising structure of the finished lead covering.
Each section of sheet is formed between adjacent rolls so that the curved roof can be weathered progressively rather than relying on one oversized piece of lead.
The perimeter edges, roll interfaces and masonry abutment then complete the system, restraining vulnerable parts of the covering while allowing the field of the lead to respond to normal changes in temperature.
Code 5 lead was used on this project. For another bay roof, lead code should be considered alongside the actual panel dimensions, geometry, exposure, support and movement strategy.
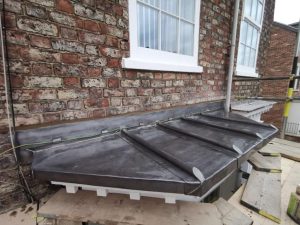
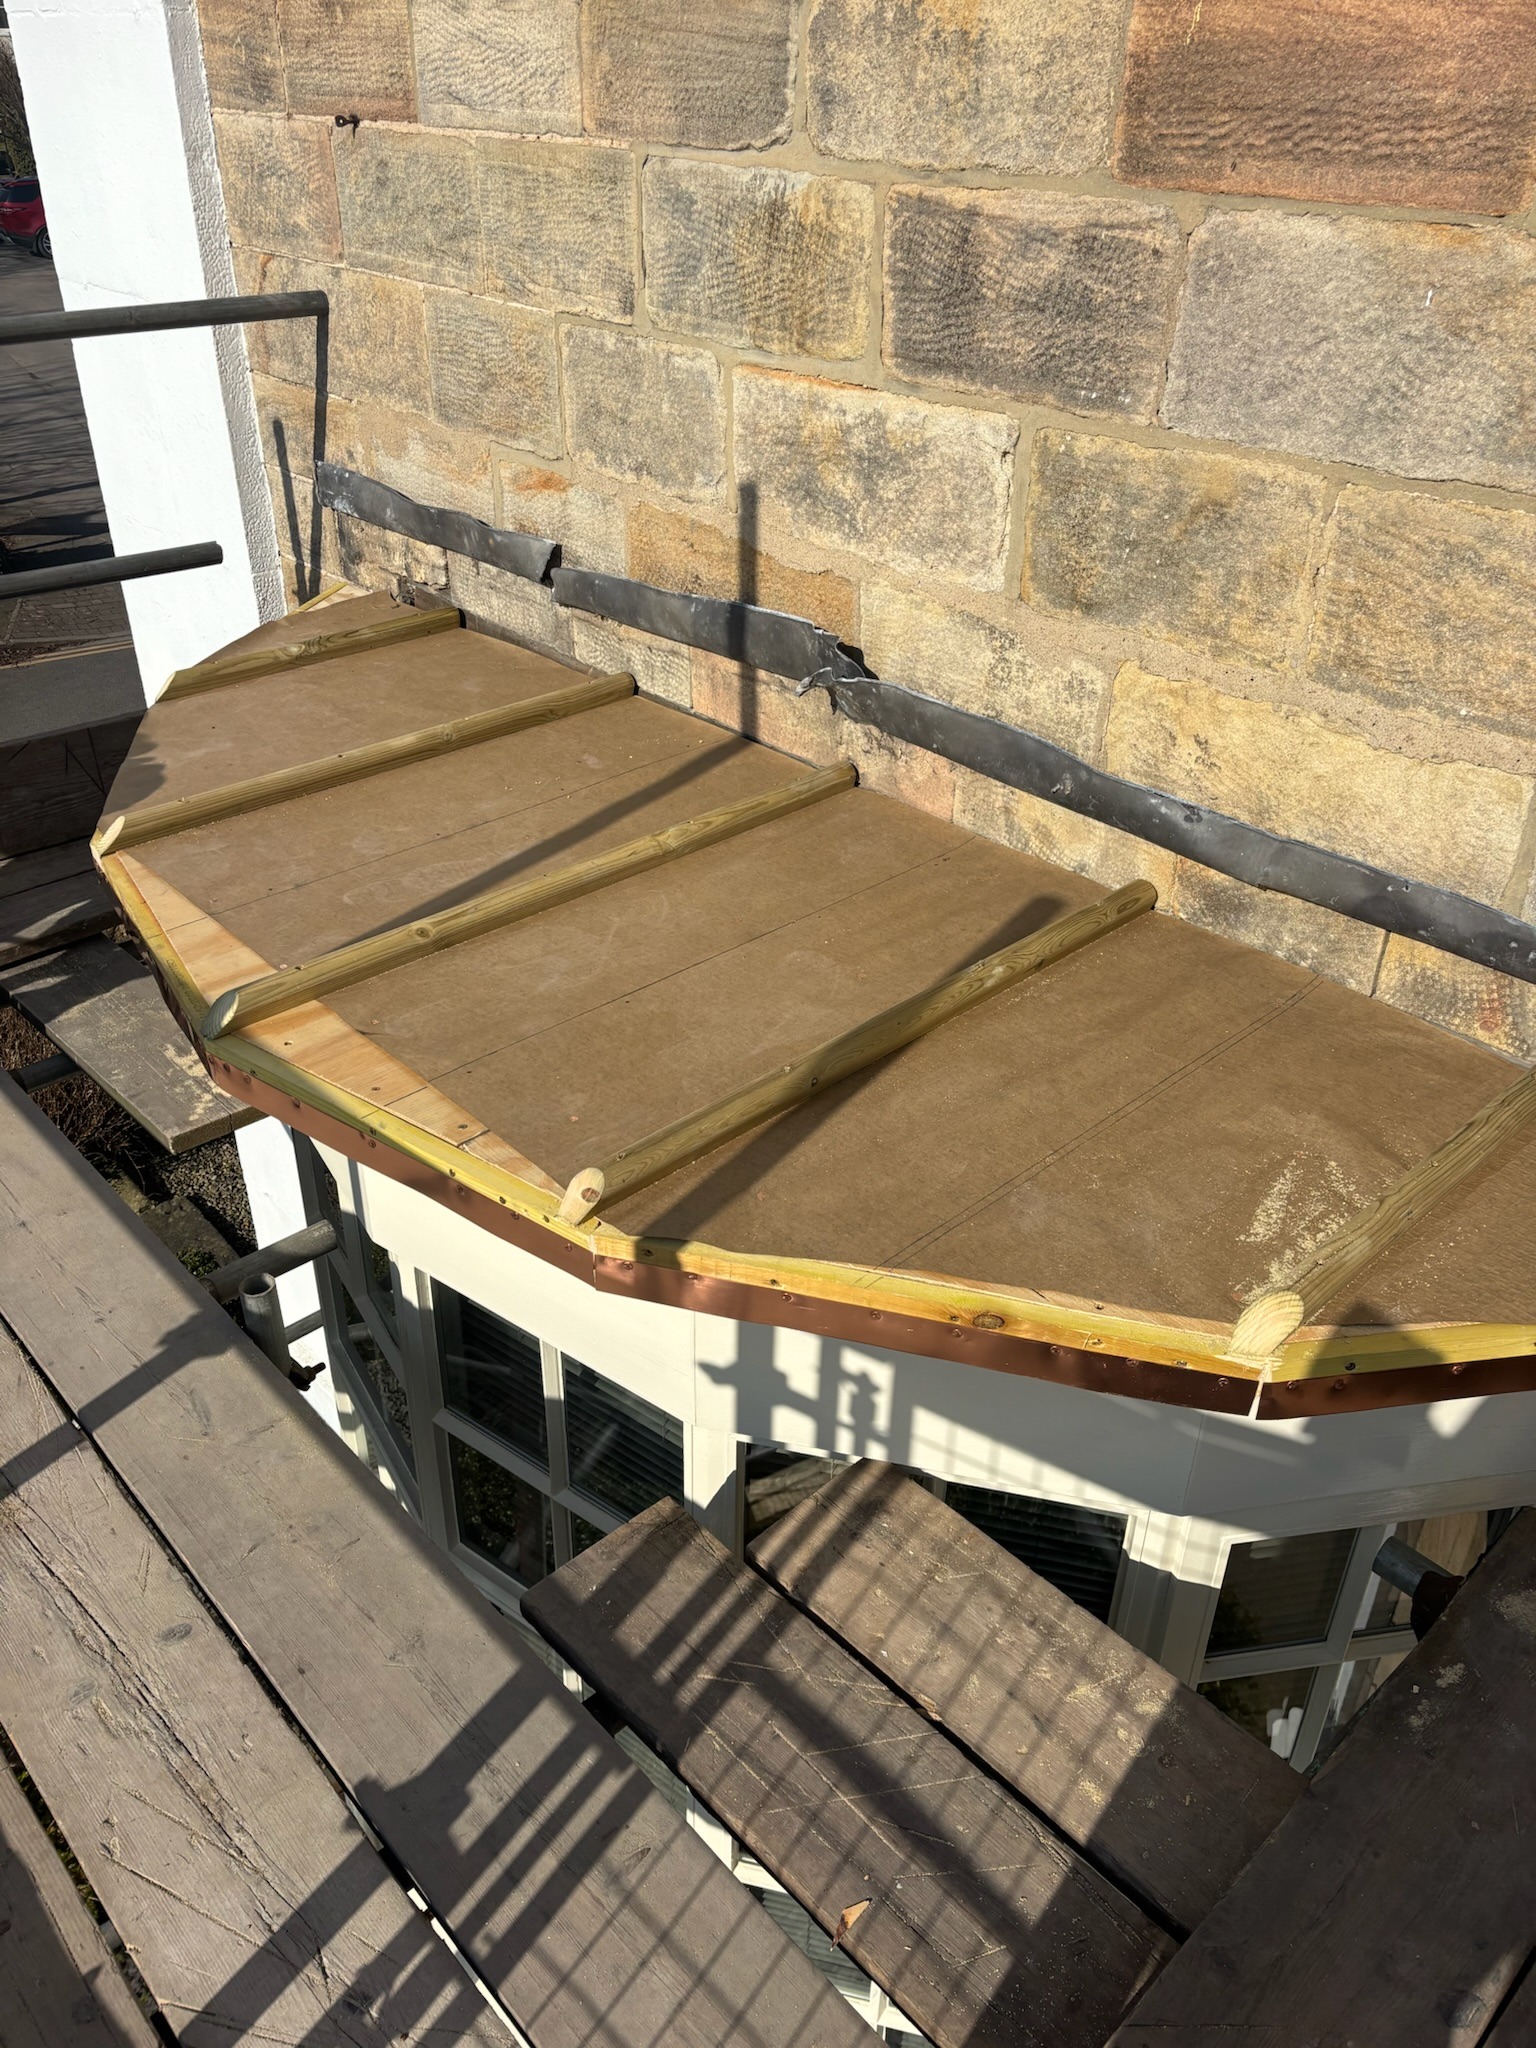
The existing bay roof before renewal of the lead covering and supporting details.
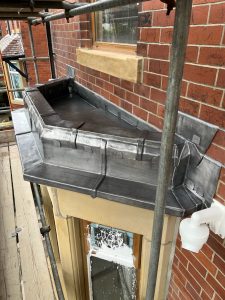
The curved bay formed as a sequence of individually weathered lead sections.
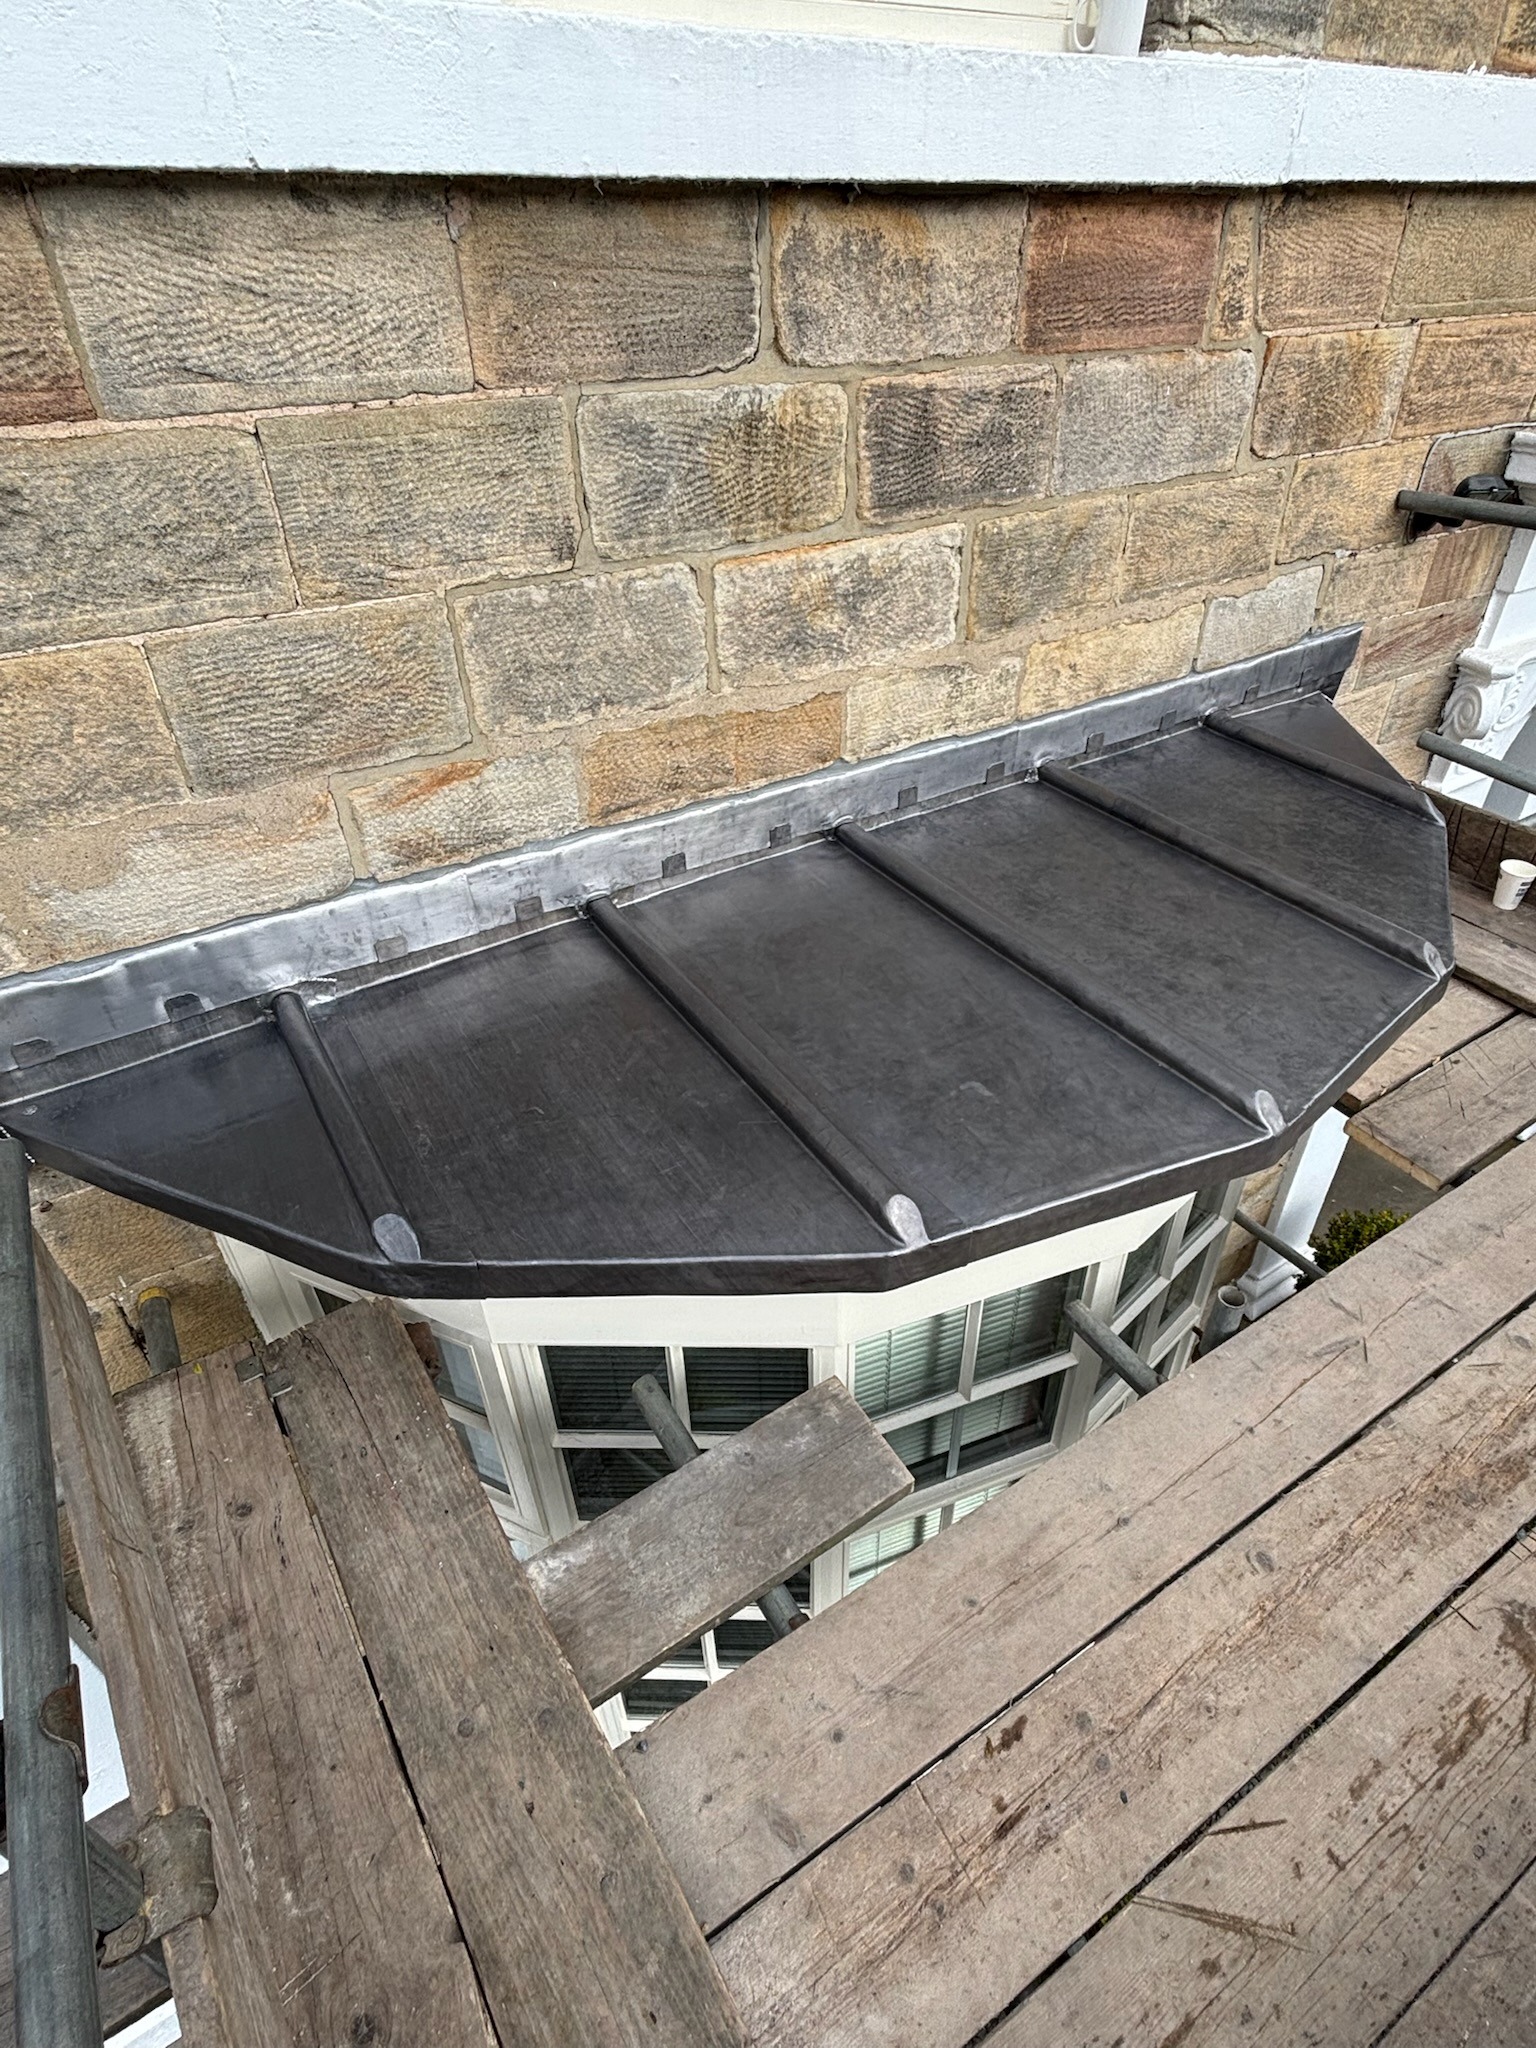
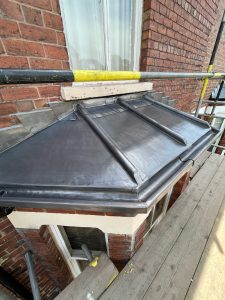
Code 5 lead, timber rolls and masonry flashings complete the new bay roof.
04 — TIMBER ROLLS
Raised timber rolls do more than create the familiar visual rhythm of traditional lead roofing.
They divide the covering into separate bays and provide a defined junction between adjacent sheets. On a curved roof, that division also makes the geometry easier to resolve by breaking the surface into manageable sections.
The lead is dressed around each roll so adjoining pieces can overlap and weather one another without unnecessarily tying the complete roof together as one sheet.
05 — MASONRY ABUTMENT
The rear edge of the bay cannot simply terminate against the stone wall.
The junction needs a separate weathering arrangement capable of protecting the transition between the horizontal roof covering and the vertical masonry.
Stepped lead flashings were formed into the masonry above the bay, with the individual pieces following the joint pattern and overlapping in sequence.
This makes the abutment an independent part of the weathering system rather than relying on sealant alone to protect the junction.
06 — SIGNATURE DETAIL
The timber rolls provide the framework through which the curvature of the roof is translated into sheet lead.
Each bay follows part of the overall form, while the rolls create clear breaks between adjoining sections.
This gives the roof both its traditional architectural appearance and a practical movement strategy.
It is a good example of traditional detailing solving two problems at once: geometry and material behaviour.

07 — PREPARATION + SUPPORT
The visible leadwork can only follow the geometry established beneath it, making accurate substrate formation particularly important on a curved bay.
08 — LEADWORK INSTALLATION
09 — MATERIALS
CODE 5 LEAD →
WOOD CORE ROLL →
18MM PLYWOOD →
LEAD UNDERLAY →
LEADWORK FIXINGS →
PATINATION OIL →
10 — THE CRAFT
The defining skill on this project is not any single joint. It is keeping the geometry, sheet arrangement, masonry interface and finished appearance coordinated across the complete bay.
11 — PROJECT RECORD
The Granby Road project record shows the transformation from the previous covering through substrate preparation and into the completed curved Code 5 leadwork.
The sequence is particularly useful because the finished roof makes more sense when the supporting rolls and construction beneath it can also be seen.
12 — CURVED BAY ROOFS
A curved lead bay roof still follows the familiar principles of fully supported sheet leadwork, but the geometry affects how those principles are applied.
The covering needs to be divided into sections capable of following the roof form without creating unnecessarily large or heavily restrained sheets.
Timber rolls, welted panels, clipped edges and separate flashing elements can all form part of that strategy depending on the shape of the particular roof.
Lead Bays Technical Guide →
Lead Bay Roof Guide →
Lead Movement + Expansion →
13 — HARROGATE LEADWORK
Project pages such as Granby Road give the Harrogate service area a real technical reference rather than relying on generic location copy alone.
The combination of stone masonry, projecting bays and traditional roof details provides a natural context for specialist lead roofing, flashing and architectural weathering work.
Leadwork Harrogate →
Leadwork Services →
Request a Leadwork Quote →
14 — WHAT THIS PROJECT SHOWS
The Granby Road bay demonstrates why a curved roof should not simply be treated as a flat roof bent into shape.
The geometry needs to influence the set-out from the beginning.
Timber rolls break the curve into individual sections. The lead follows those sections. The perimeter deals with the exposed edge, and the stepped flashings independently weather the junction with the masonry.
The result comes from coordinating those components rather than asking one oversized sheet to perform every function.
PROJECT TAKEAWAYS
15 — FREQUENTLY ASKED
Code 5 rolled lead sheet was used on this project. The appropriate code for another bay depends on the individual panel dimensions, geometry, exposure and detailing.
Timber rolls divide the covering into separate lead bays and create raised weathering joints. On a curved roof they also provide an orderly way of breaking the geometry into individual sections.
The roof covering and the vertical abutment perform different functions. Properly formed flashings protect the junction where the lead roof meets the wall rather than relying on a surface seal alone.
Yes. Fully supported sheet lead relies on a stable and correctly formed background. On a curved bay, inaccuracies in the supporting construction can also affect the finished geometry.
Some local defects may be repairable. The appropriate approach depends on the extent of the defect, the existing sheet arrangement, interfaces and condition of the supporting construction.
The Lead Lads® Lead Bays Guide and the Shop’s Lead Bay Roof Guide cover bay layout, timber rolls, substrates, movement and material selection in greater detail.
16 — MATERIALS + RESOURCES
Lead Roofing Project Archive →
Lead Bays Guide →
Leadwork Standards →
Lead Bay Roof Guide →
Code 5 Rolled Lead →
Wood Core Roll →
18mm Plywood →
Lead Underlay →
Leadwork Fixings →
Patination Oil →
Lead Sizing + Ordering Chart →
THE LEAD LADS® / PROJECT ARCHIVE
Granby Road forms part of The Lead Lads® archive documenting real applications of rolled lead sheet across bays, roofs, gutters, dormers, flashings, canopies and specialist architectural details.
This Harrogate project demonstrates how timber rolls, individual sheet sections and masonry flashings can be coordinated to weather an architectural curve without losing the traditional character of the detail.